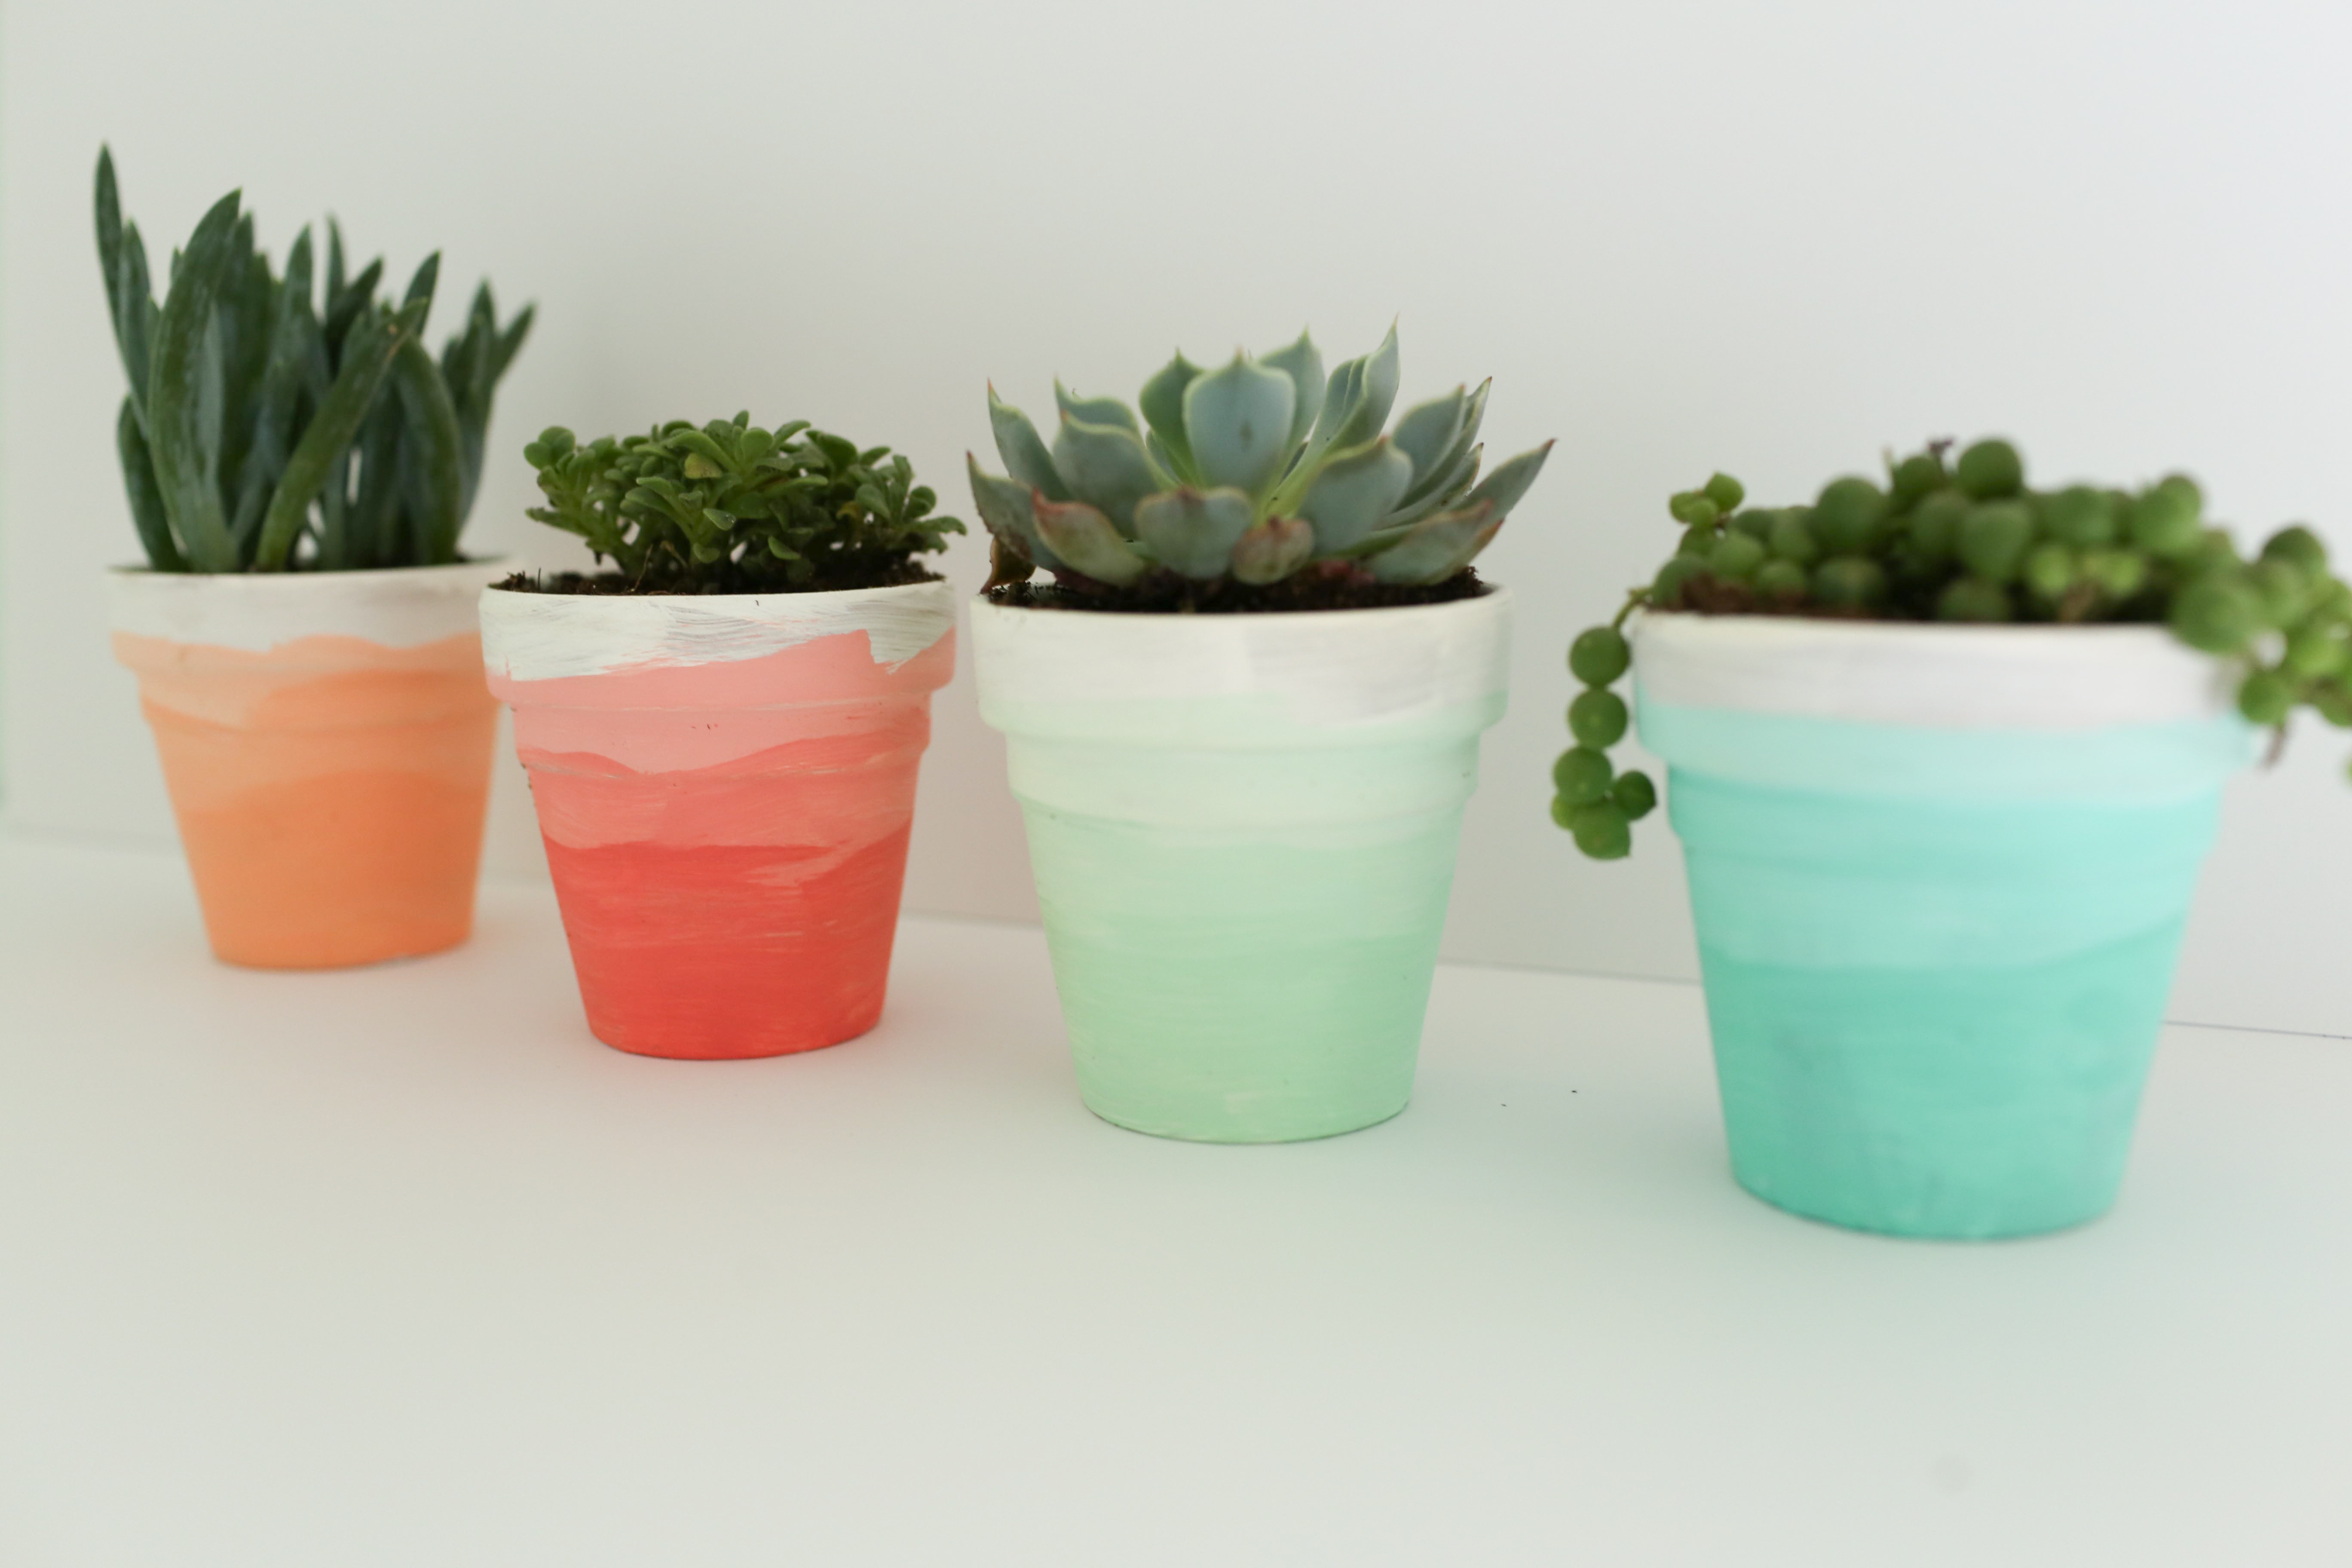
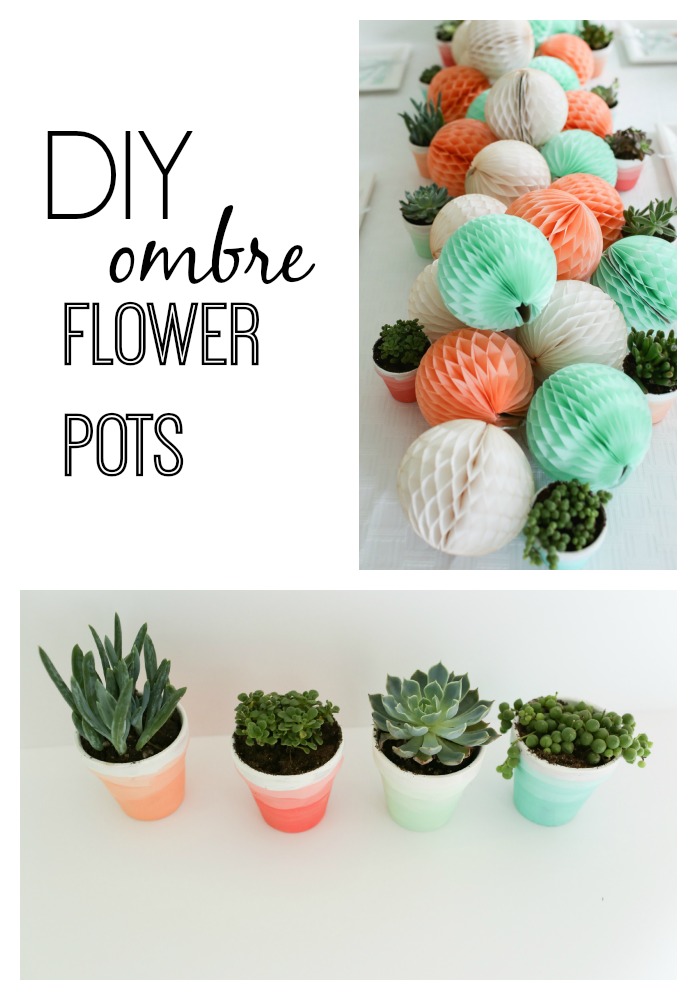
Today I am sharing with you how I created the ombre pots that were featured in the Mint and Coral party. These ombre pots did double duty, decorating the table for brunch and also going home with guests as cute little party favors! If you missed the post about the party take a minute to check it out. It was all about celebrating the arrival of a baby with a party full of mint and coral details. Lots of the party details could work at a birthday party, bridal shower and even a wedding.
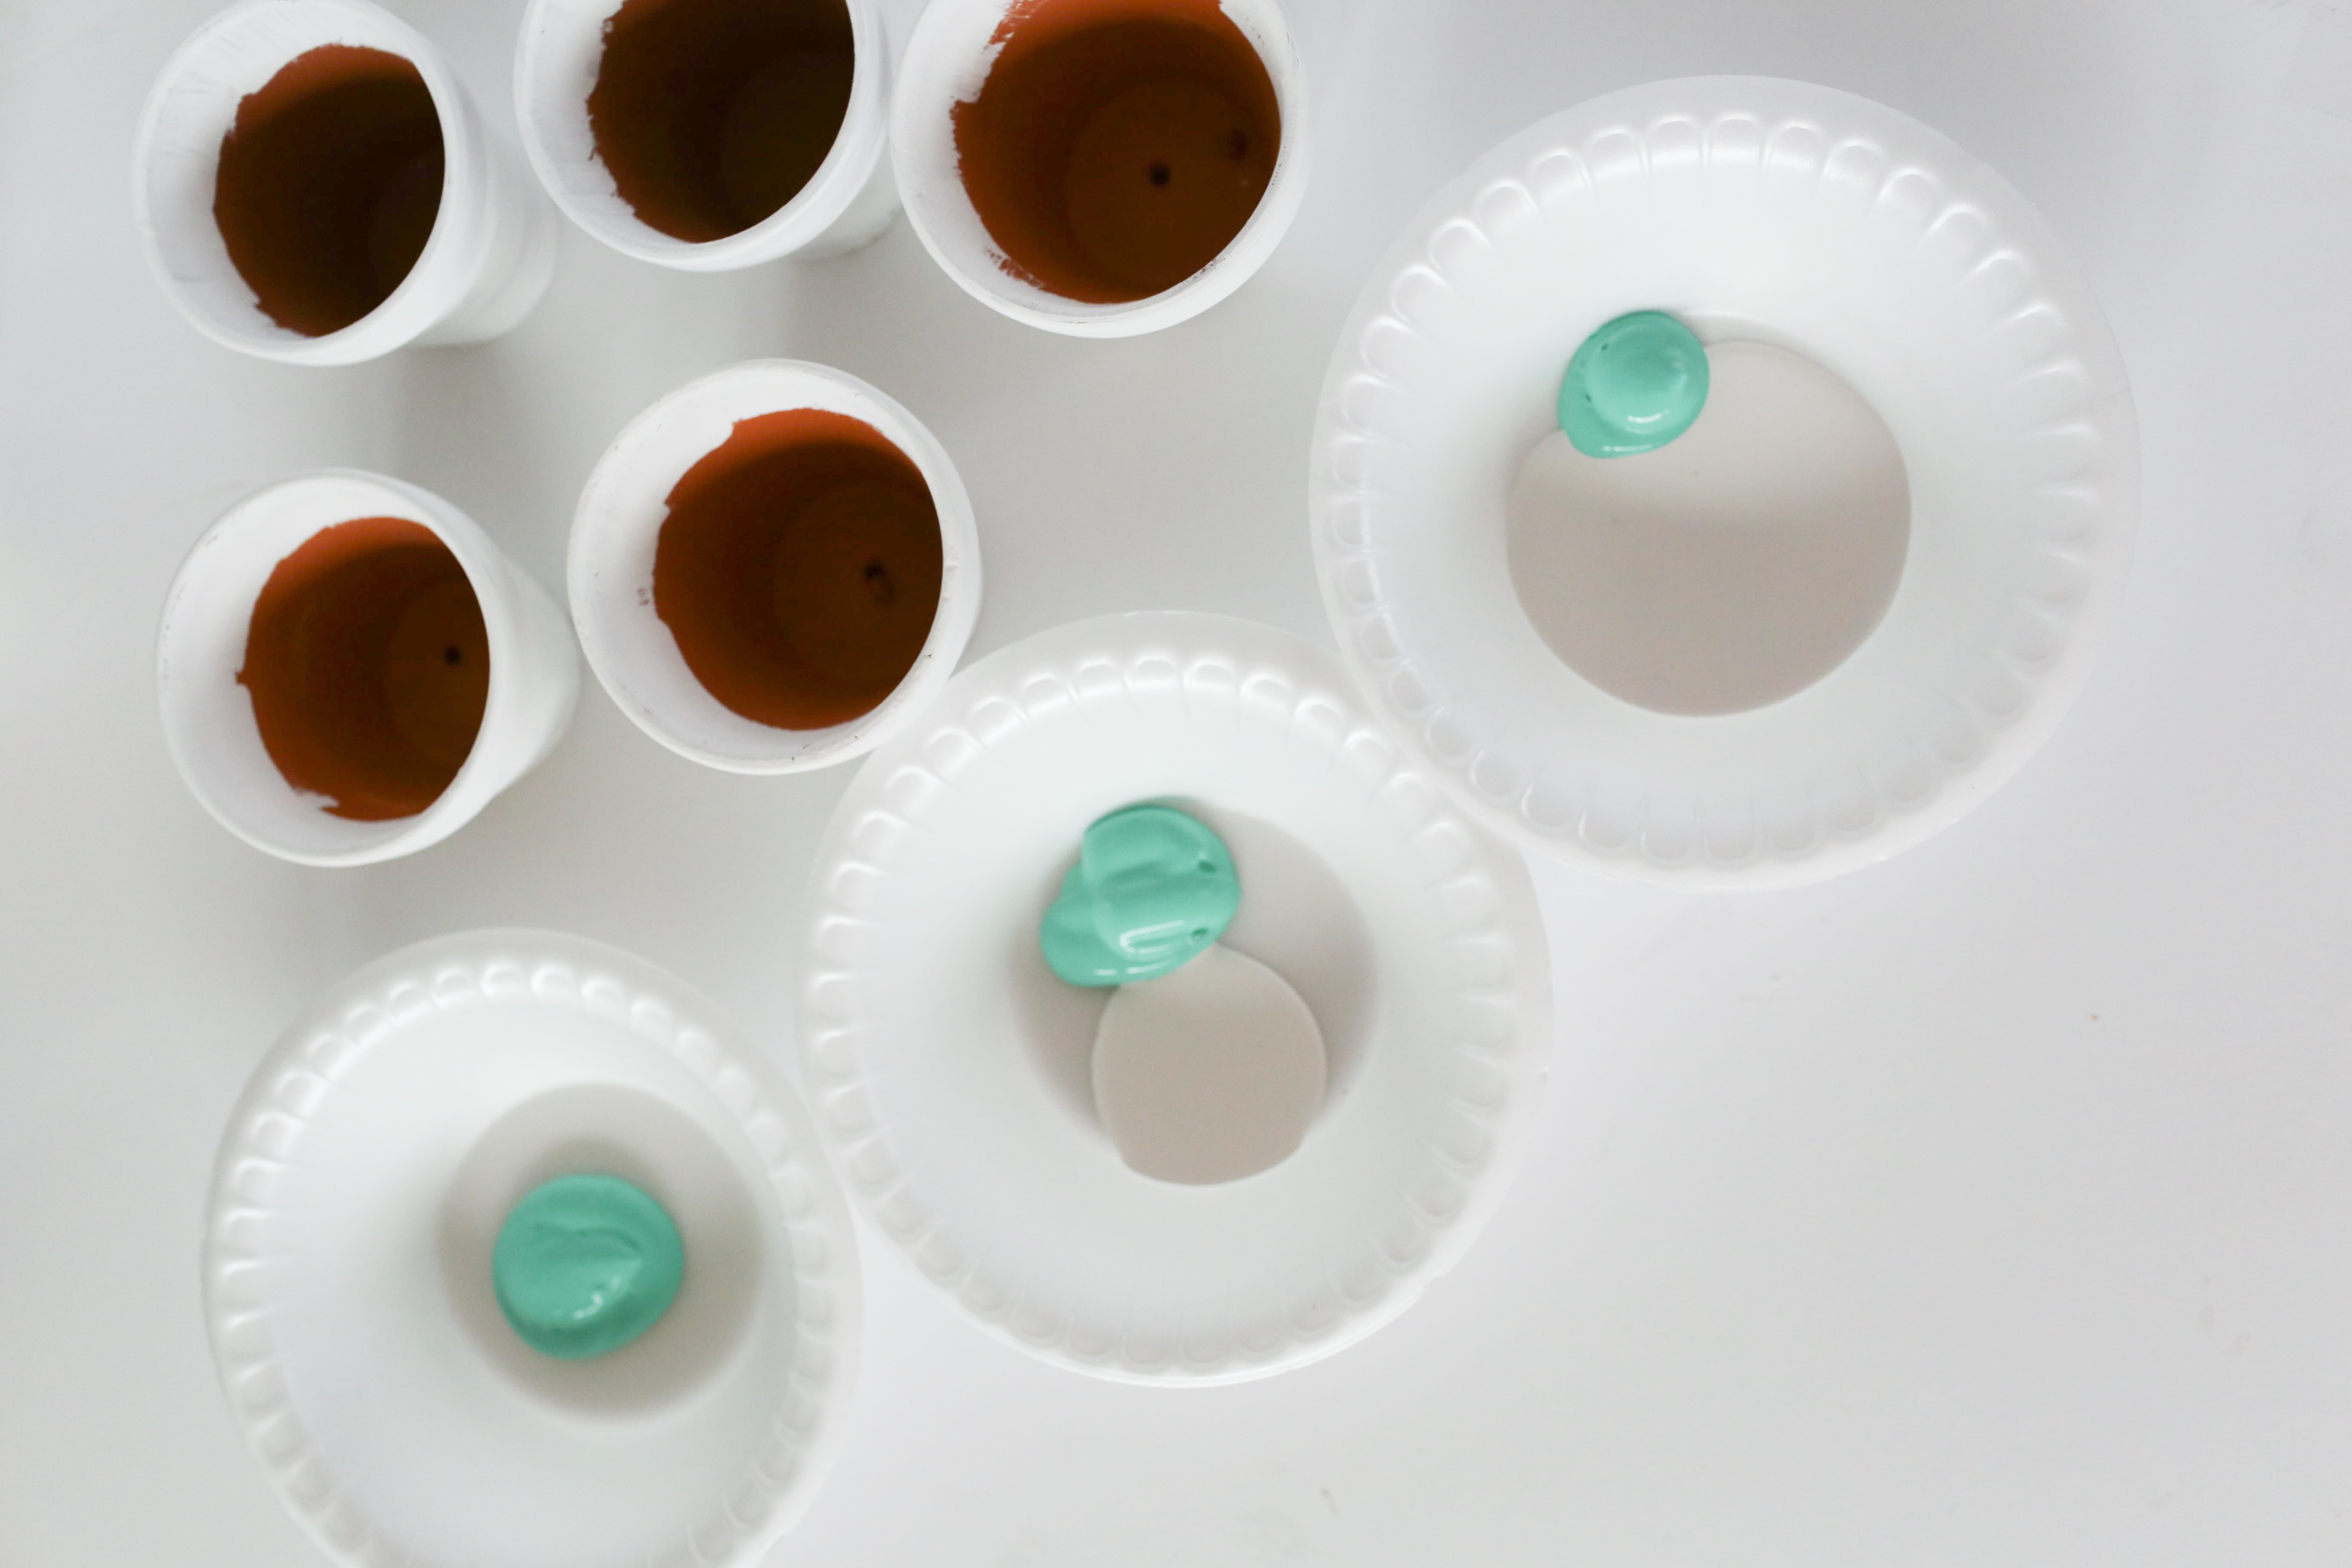
To create these ombre pots you will need a few supplies: a terra cotta pot, acrylic craft paint
(this paint color will be the darkest color on your pot), white acrylic paint, paper plates/bowls for mixing, brushes.
step 1 | First paint layer. Begin by painting the top half of the pot with the white paint. While this is drying you can mix the rest of the paint colors.
step 2 | Mix remaining colors. Use three paper plates to prepare the other three colors. One plate will be the original acrylic paint color. This will be your darkest color. The next plate mix together your acrylic paint with the white paint. Make it a ratio of 1:1, equal parts color to white paint. Mix it together. The final color should be a ratio of 1:2. One part your color and two parts of the white paint. Mix together. This will be the lightest color.
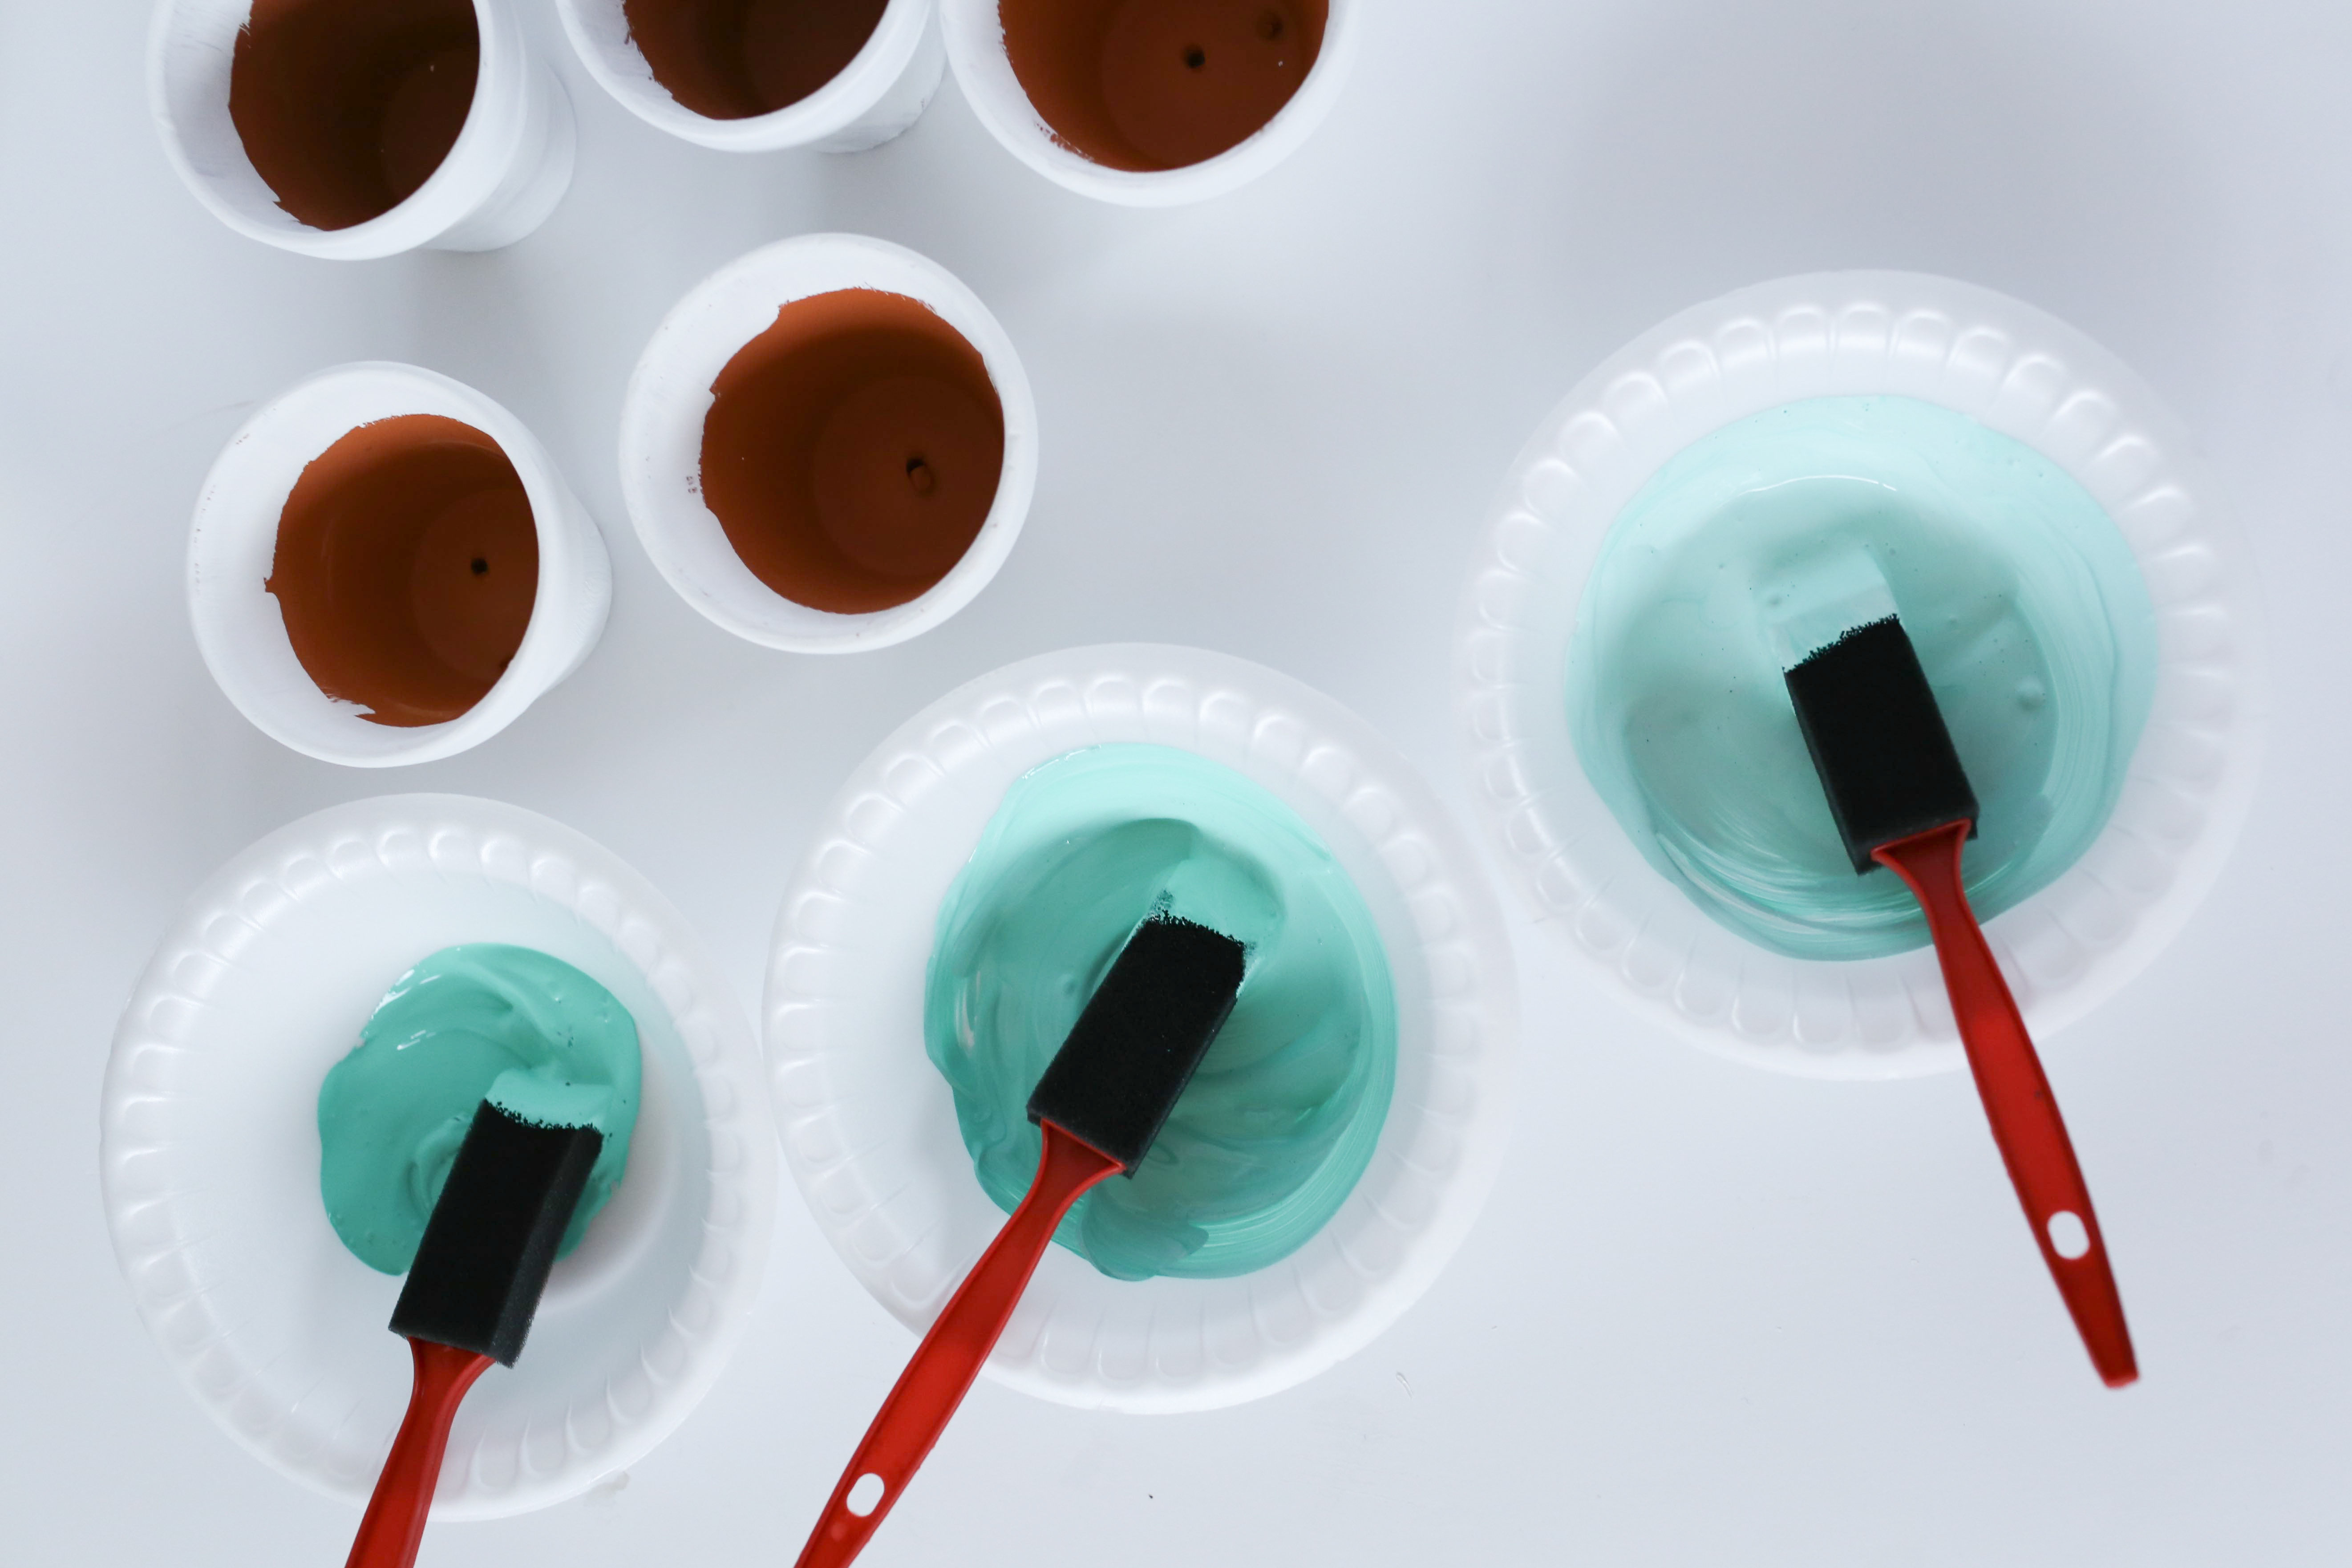
step 3 | Second paint layer. The next layer of paint will be the lightest color {your 1:2 ratio}. I used a basic foam brush to put a layer of paint around the pot. This will overlap some of the white paint color that is already on the pot.
step 4 | Third paint layer. The next layer of paint will be your middle color {the 1:1 ratio}. Apply with anew foam brush, allowing part of this layer to overlap the second paint layer.
step 5 | Fourth paint layer. This final paint layer will be your original acrylic paint color, the one that was not diluted. It should be applied with a new brush, overlapping some of the third paint layer, and go down to the bottom of the pot.

step 6 | Allow to dry and fill. Allow your pots to completely dry before filling with dirt and succulents. If there is no draining hole at the bottom of the pot you can add some small rocks to allow the dirt to drain.

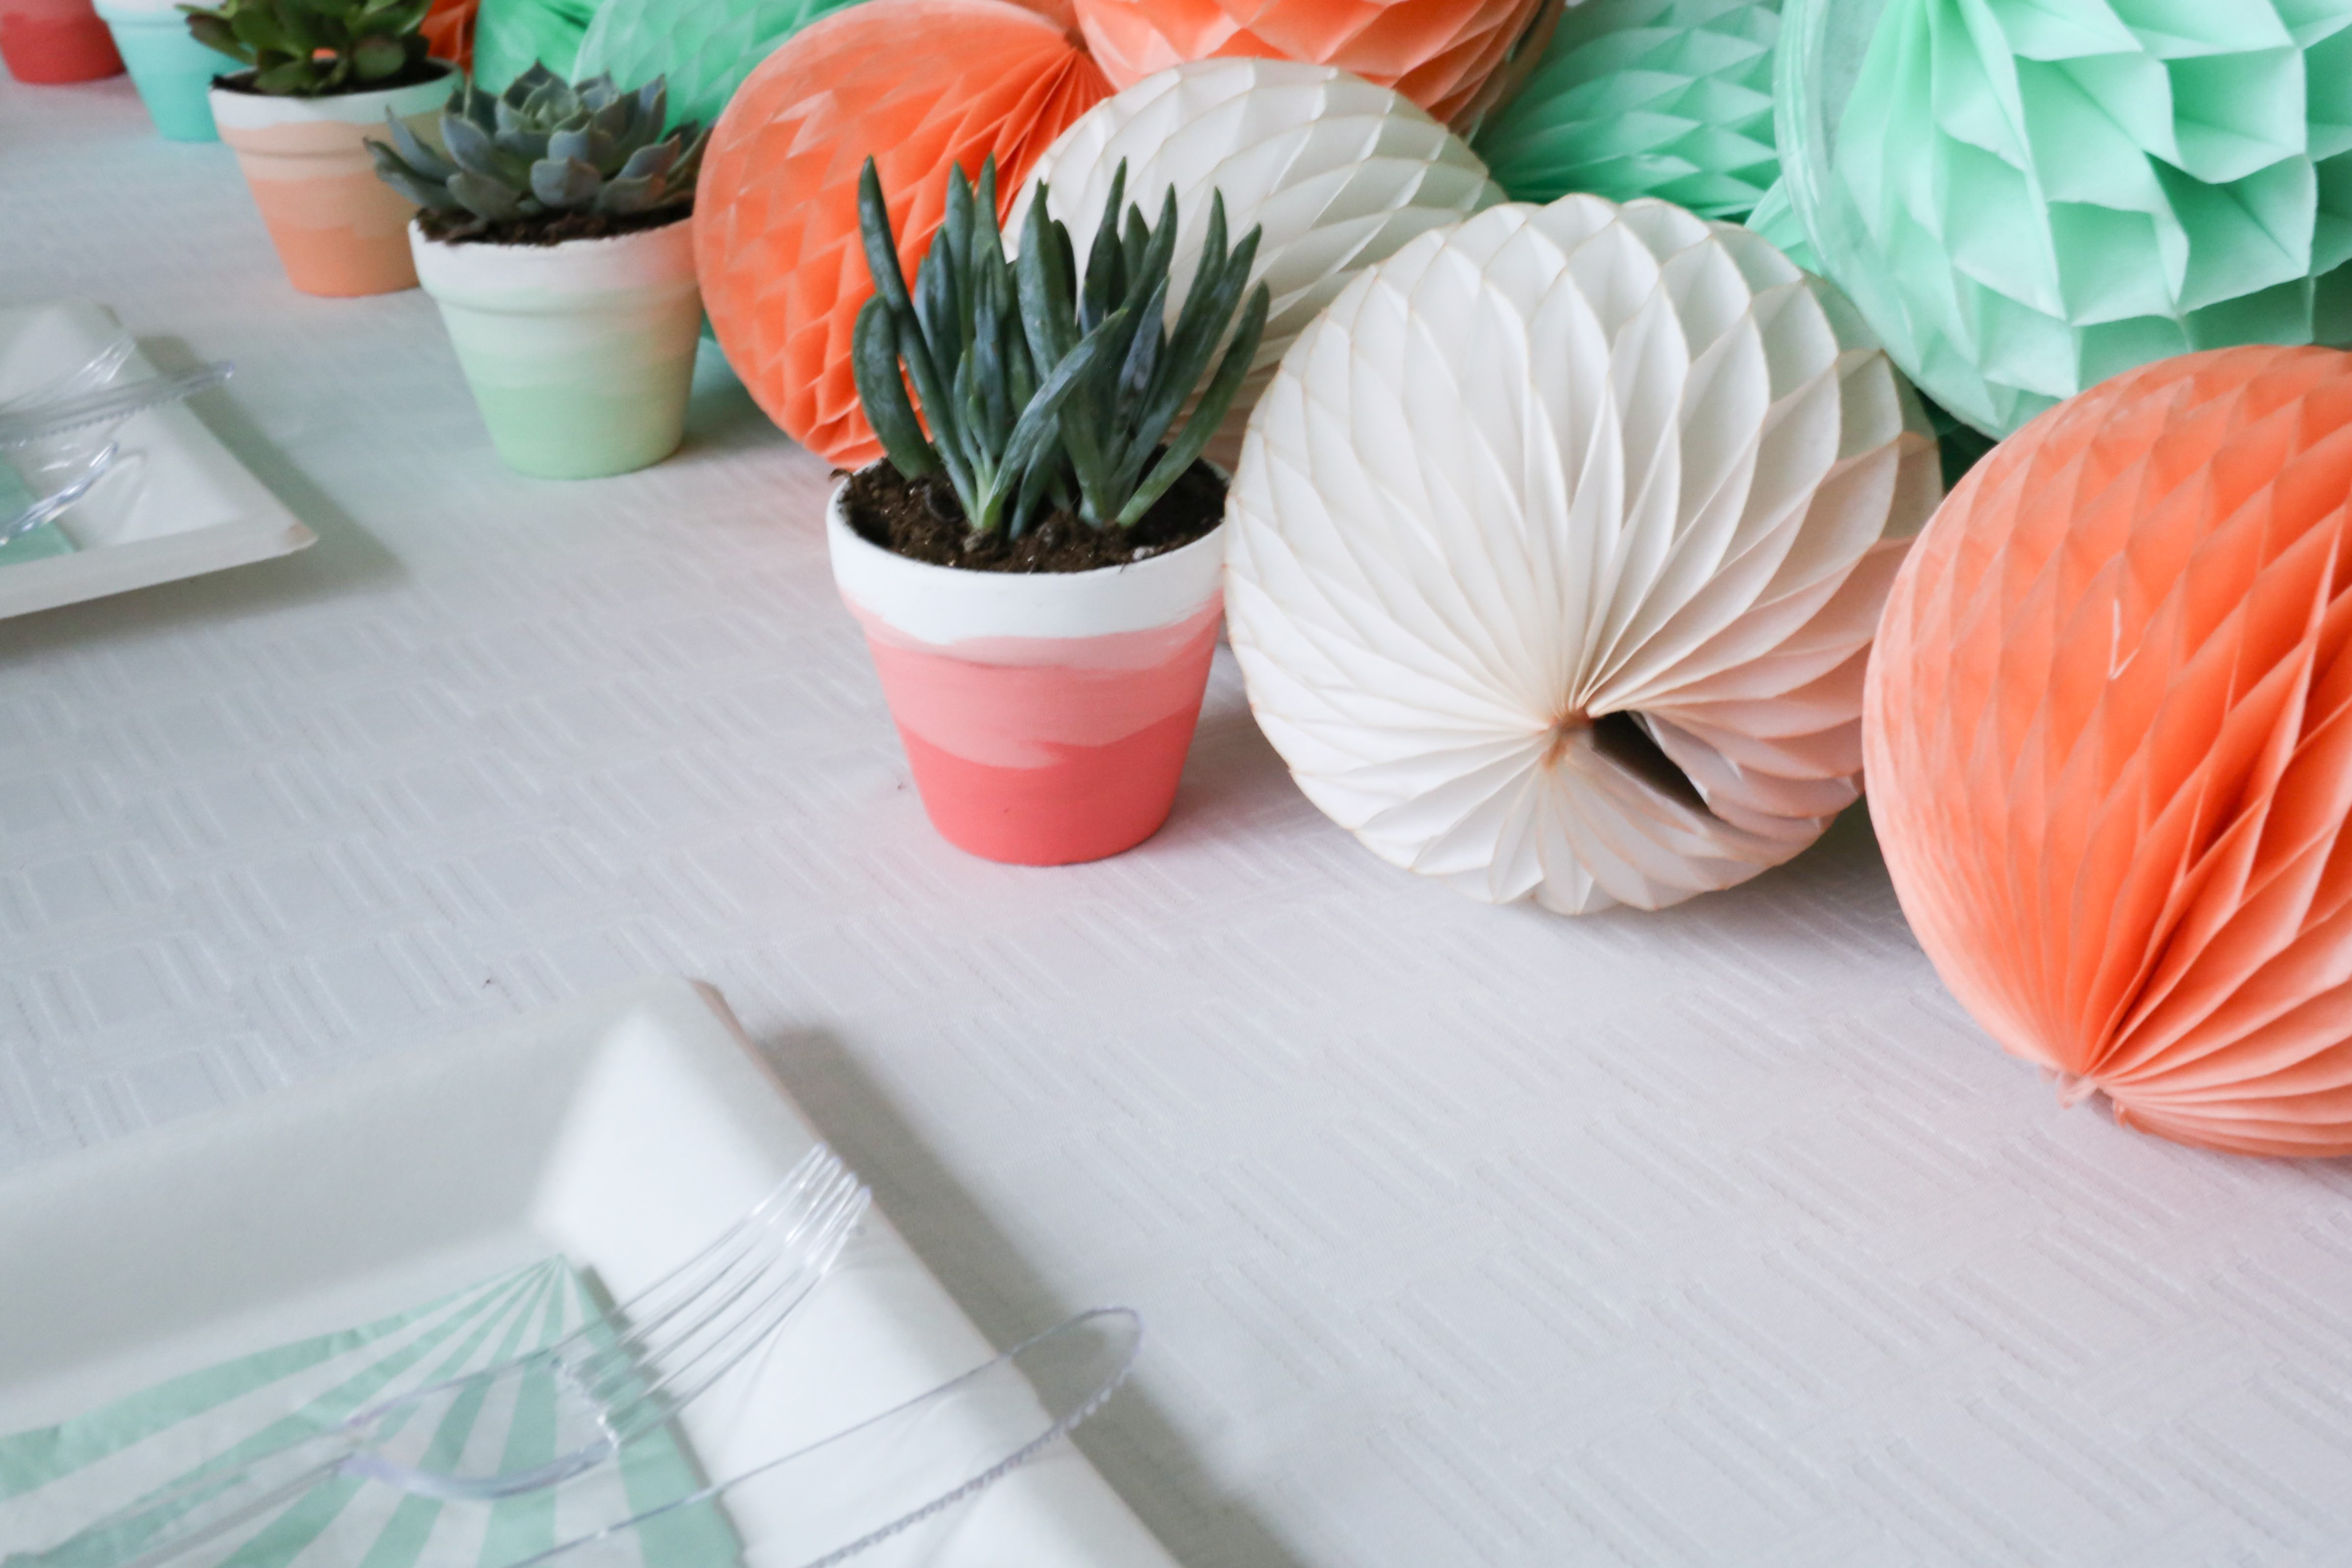
I repeated this process with four different acrylic paints. Two mint colors and two coral colors. This gave us four different ombre pots for our party. These, combined with the centerpiece made of mini honeycomb balls, created a stunning and one of a kind tablescape! If you create your own ombre pot I would love to see some pictures! Be sure to tag me in your social media photos so I can find you.
Happy creating,

These are so pretty! I lI’ve the colors 🙂
Thanks so much Donna 🙂
I just found some tiny little pots in the dollar section at Target. Definitely going to do this to them. Thanks for the inspiration!! So cute!
Dollar spot + Target = so many great projects! Enjoy 😉