This year I am proclaiming no more ridiculous guilt over desiring to create a beautiful home. We throw stones that those who enjoy creating and decorating are people who waste money and time. Or my favorite, they make those who don’t love to decorate feel bad. No more of that nonsense. We can create beautiful homes within our budgets without needing to throw ourselves into the vanity department. I am from this moment on ignoring all of those memes that imply loving your home, and working hard to make it look lovely and feel welcoming, is frivolous. (You know, those ones that are all about how Pinterest in the enemy and real moms are just trying to survive making PB&J sandwiches day after day. They make me want to scream “Balance people, it’s all about balance!”) Sometimes it just takes a couple of hours and some directed creativity to create the look you love.
Sometimes it just takes a little time and some directed creativity to create the look you love. So let’s start talking about that instead. First up is my piano. This project was about $50, took around 2 hours, and still made a big impact.
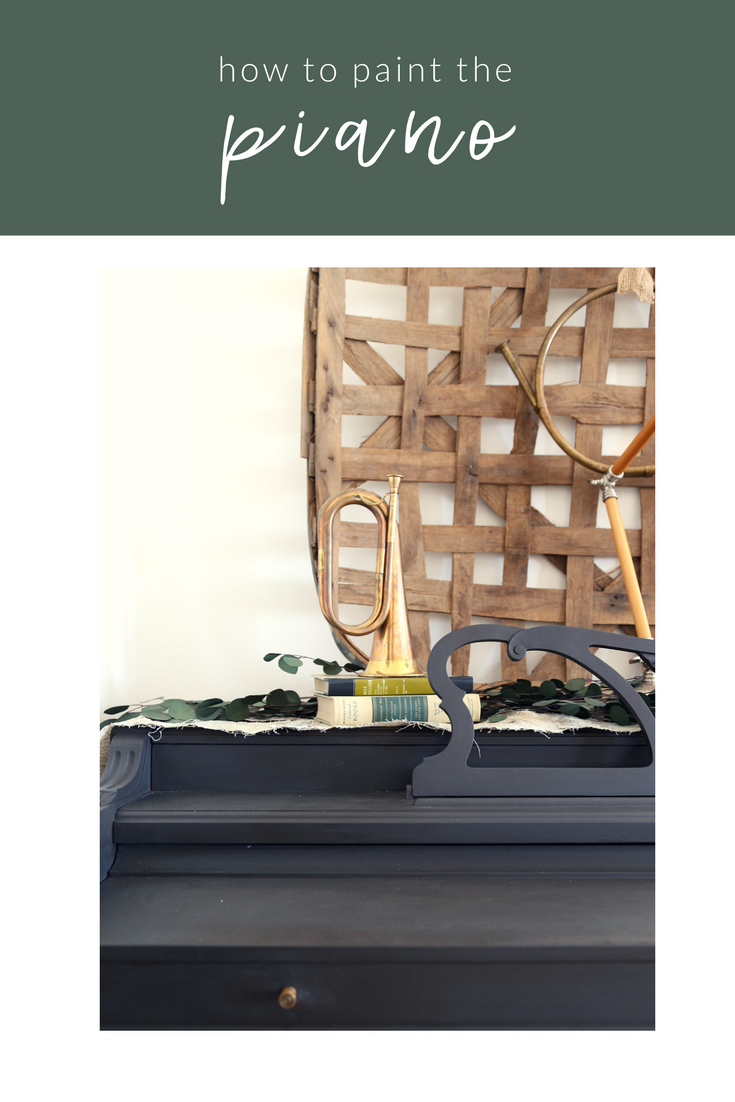
before

The girls play the piano and it is one that has been passed along from my grandparents to my parents and now to me. I didn’t want to look for a new piano that matched my Modern Farmhouse taste, and that isn’t in the budget right now anyways. So instead of going to Craigs List I picked up some chalk paint. Now I still have my piano that has been passed along, it fits my design style, and I didn’t have to sacrifice my vanity to get there. (Sorry, I couldn’t resist.)
Interested in painting your own piano? Check out my 4 easy steps to overhaul your piano.


supplies
- chalk paint (I used Annie Sloan paint in graphite.)
- painters tape
- stiff bristled brush
- furniture wax (This one by Annie Sloan or the one I used by Miss Mustard Seed.)
- 2 or more lint free rags
directions
- Tape off the piano. Make sure you use a high-quality tape, you don’t want leaks or drips when painting around the piano keys. (This is my go-to painter’s tape.) Make sure you tape around the edges of the keys, casters, and any other hardware. I slid the tape down along the sides of the keys to catch any paint from dripping down.

- Begin by trimming along the piano keys and any other hardware or edges. I went over the trim work twice to prevent the need for touchups later on.

- Once the trimming is finished it is time to apply chalk paint to the rest of the piano. I used a stiff bristled brush for applying the thick paint. Apply in thick layers, brushing in the same direction. Allow the paint to dry and then apply a second coat.


- After allowing the paint to dry overnight it is time to protect the newly painted piano. I found the charcoal colored paint created more of a gray colored finish than the black I was hoping for. So to darken the piano I used a dark colored wax. Annie Sloan carries a black wax, but I didn’t have it on hand. So I used the furniture wax that was on my supply shelf, Miss Mustard Seed Antiquing Wax. This wax has more of a dark brown color as opposed to black but it still darkened the paint color. You can apply the wax with a lint-free rag or a wax brush, rubbing it on the piano in circular motions, adding it heavily to the detailed or ornate areas. Apply to a small section and then go back with a clean lint-free cloth and wipe off the excess wax. (Do not allow the wax to harden before wiping off the extra.) Allow to dry and your piano is ready to go!

I have walked into the living room several times since painting the piano and found cups sitting on the piano without a coaster. Thankfully I have yet to see any rings or marks left on the painted surface! The piano is holding up well and I’m loving the contrast of the furry white rug on the black piano bench.
If you love the look of the painted piano, or want to save the idea for later take a moment and share on social media and Pin it for later. We love it when you share and save! What are your thoughts on the painted piano? Is it something you want to tackle in your home? Maybe there is another piece of furniture you are itching to paint? I’d love to know what you want to do in your own home. Tell me about it in the comments or on social media.
I’ve noticed a lot of those anti-Pinterest memes and discussions lately. My response is usually that I just enjoy homemaking projects. They help me relax and make me happy. Some people work out, some people play board games, some people veg in front of the TV, I just like to cook and create.
As for the piano, I love the new color. It’s the perfect combination of classic and modern. There have been some pretty amazing painted pianos out there lately in bright colors, but this looks like a color that will stand the test of time. Thanks so much for the tips!
Thanks so much Leslie, glad to know there are others who understand where I am coming from. 🙂 And I’m hoping the piano will stay this way for many many years.
Love the piano!
I appreciate what you said about working to make our homes beautiful, but also your desire to make a beautiful home for your family. Projects like this one are a labor of love and the results are worth it!
Stopping by from this week’s Encouraging Hearts and Home blog hop.
Glad you love the piano! And thank you for the encouragement, it’s all about our attitudes and mindset, isn’t it?
This turned out beautifully! I absolutely love what a difference the paint made and lovely it looks. Thank you for linking it up to our the Inspiration Galore Project Party. Pinned and shared. Have a great weekend!
Thanks for stopping by and checking out our piano. x
I love how this project turned out. I’m not sure I would be brave enough to try painting my piano! Pinned and sharing! Thank you for joining us at Family Joy Blog Link-Up Party. I hope you will join our next party starting Sunday at noon EST.
I must admit I was really nervous when I was starting out! It’s so much easier to paint something you pick up for $10 at a garage sale, isn’t it?
I love the look of your painted piano. It’s really cool that you don’t have to sand down the piano before painting with chalk paint. That saves so much time and makes the job a lot easier. Thank you for sharing your DIY piano project at the #HomeMattersParty
Yes! No sanding is why it is my favorite 😉
It looks GORGEOUS now! I’m still trying to get the hubs on board with me painting over some old wooden furnishings in our house. I’ll have to show him how great your piano turned out.
It is intimidating to paint your furniture! But honestly, it can always be stripped and stained again. That’s what I tell myself when I get nervous 😉
This is truly stunning! My parents have a piano and I wonder if they’ll let me do this to it 😉 Pinning and sharing!
Thanks for sharing Angie! I’m so happy I decided to give it a try!