Would you ever use a small sized dresser as a nightstand? Or better yet, would you take a small vintage dresser, stick some shiny gold on it, and then declare it to be your new nightstand? I had this picture in my head when I first saw this dresser but I wasn't totally sure how it would turn out. After a couple of weeks going back and forth I finally decided to take the leap and make this dresser filled with character our new nightstand.
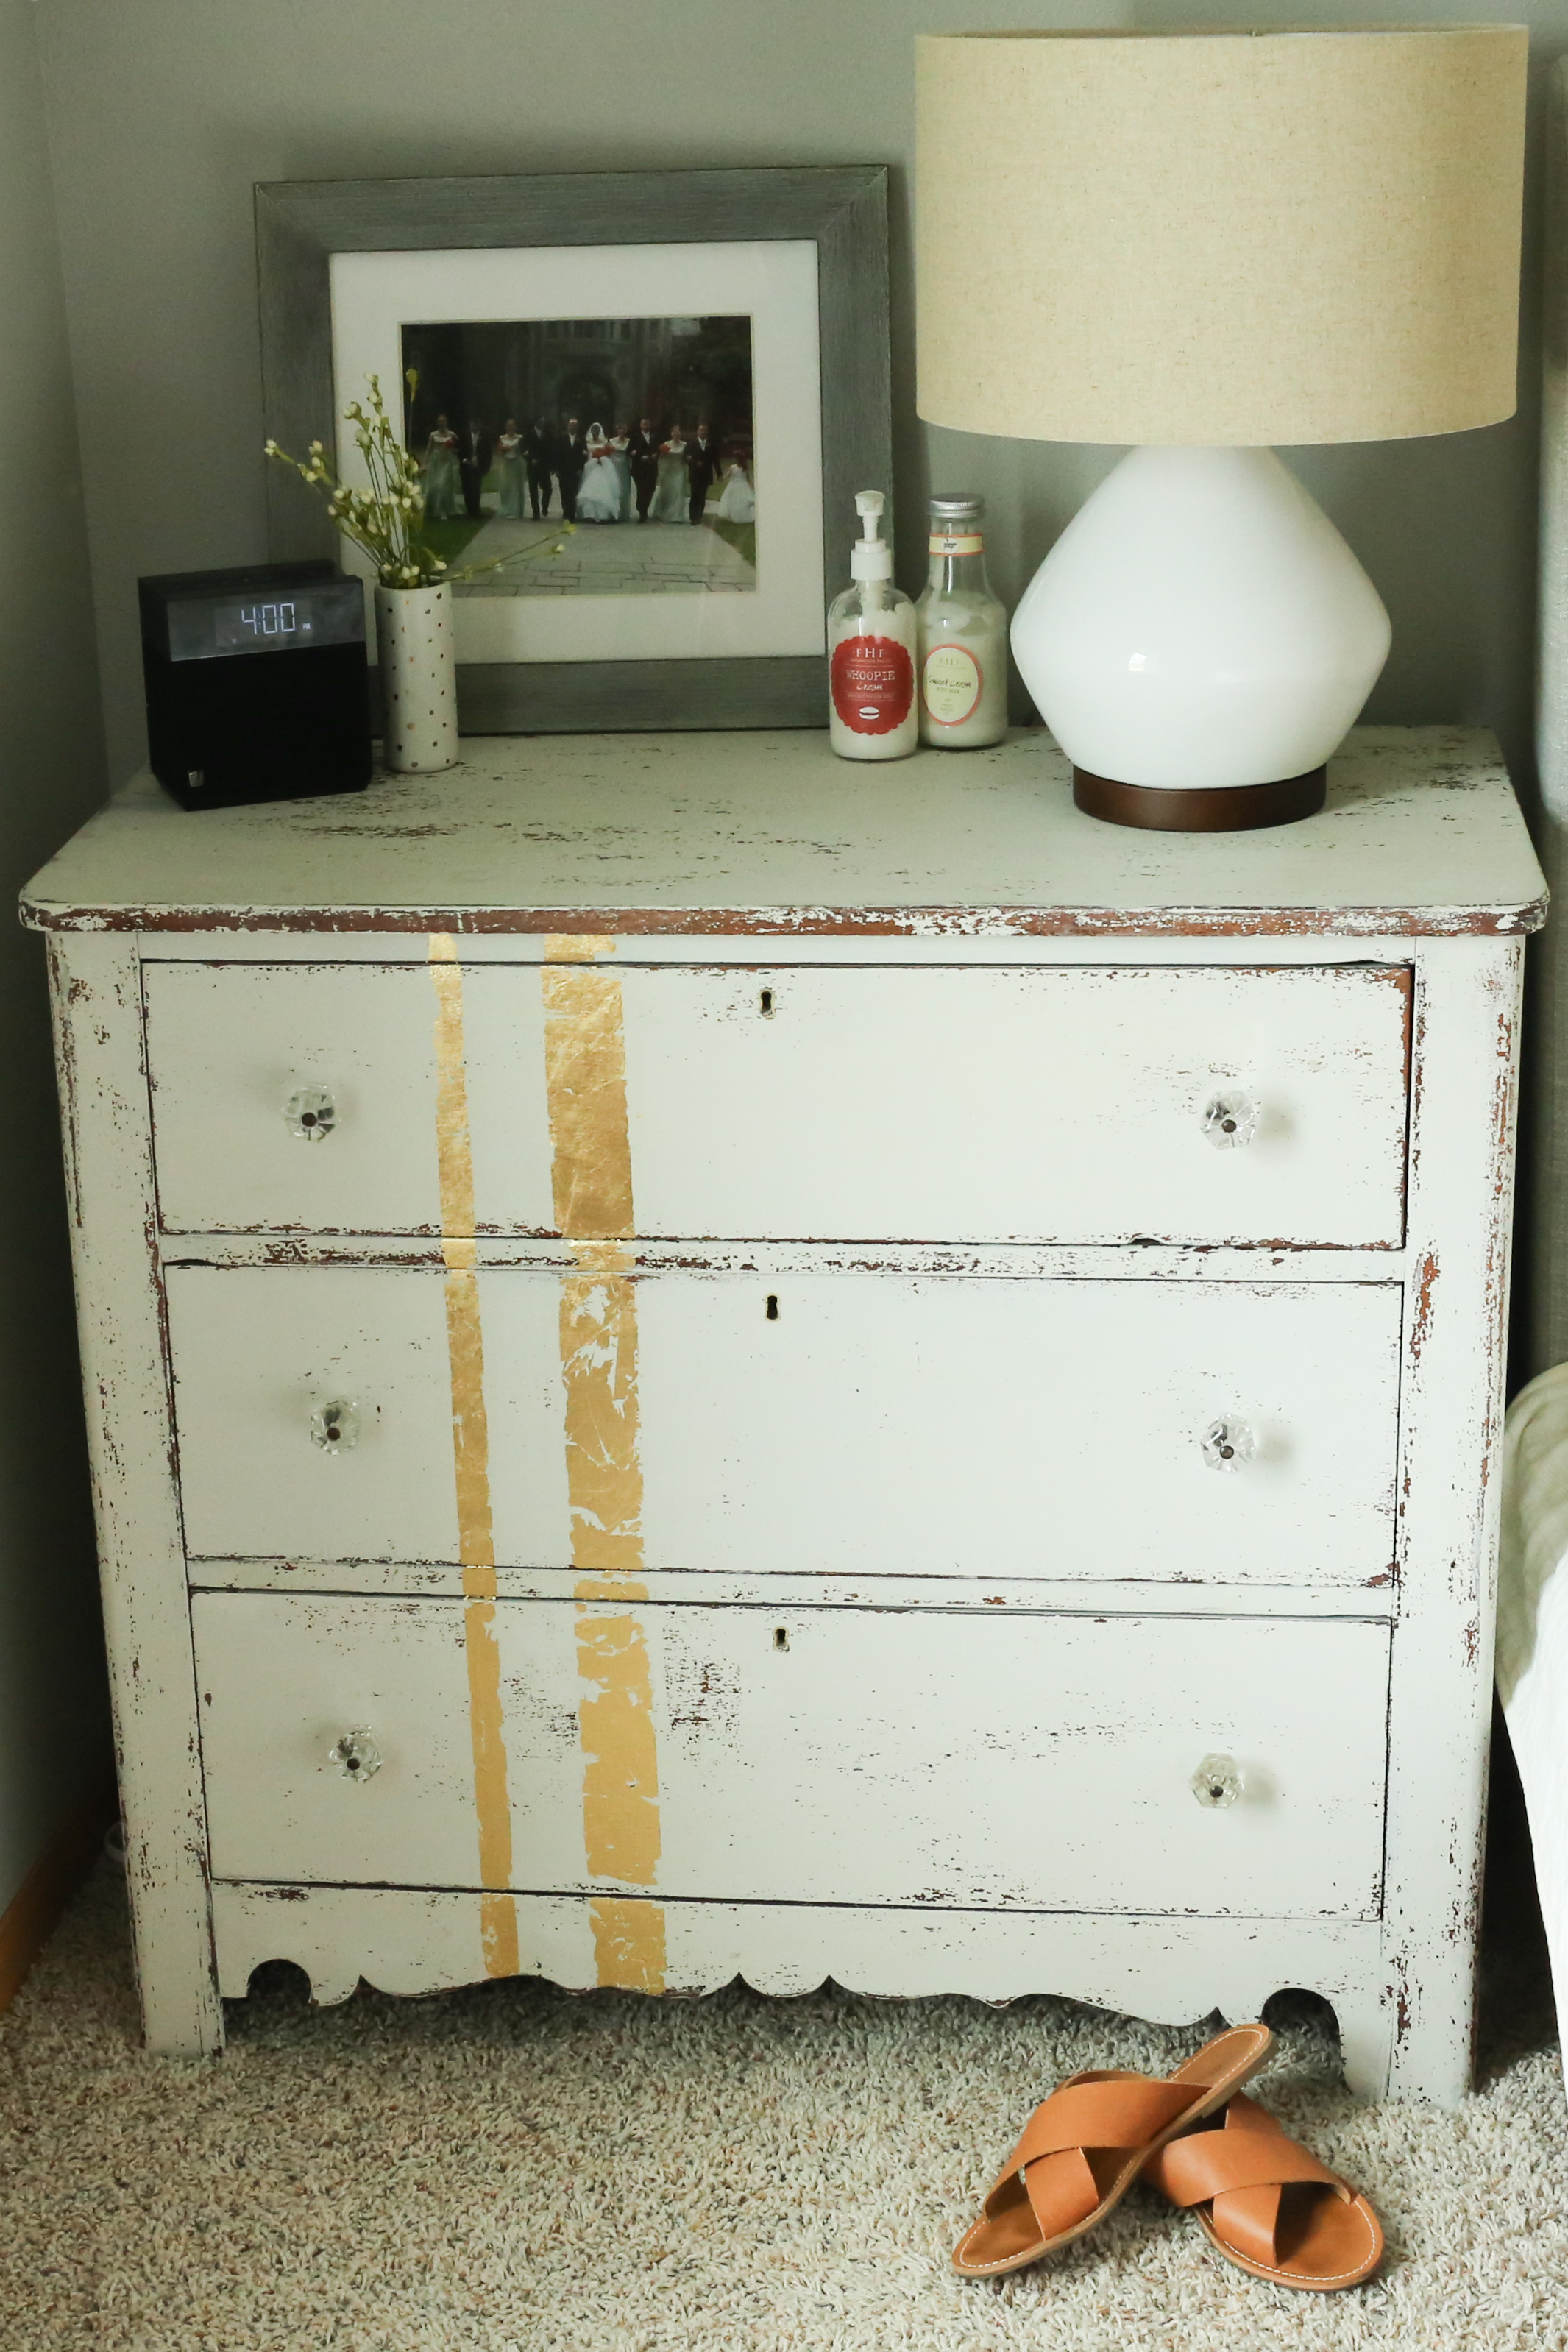
I was fortunate enough to find this small nightstand already painted at a fabulous local store. When I realized it was painted in the same color that I had just painted our round nightstand I knew it was meant to be! The sanding and painting were already done for me. All that was left was for me to add some gold leafing and I would have two very unique and yet coordinating nightstands.
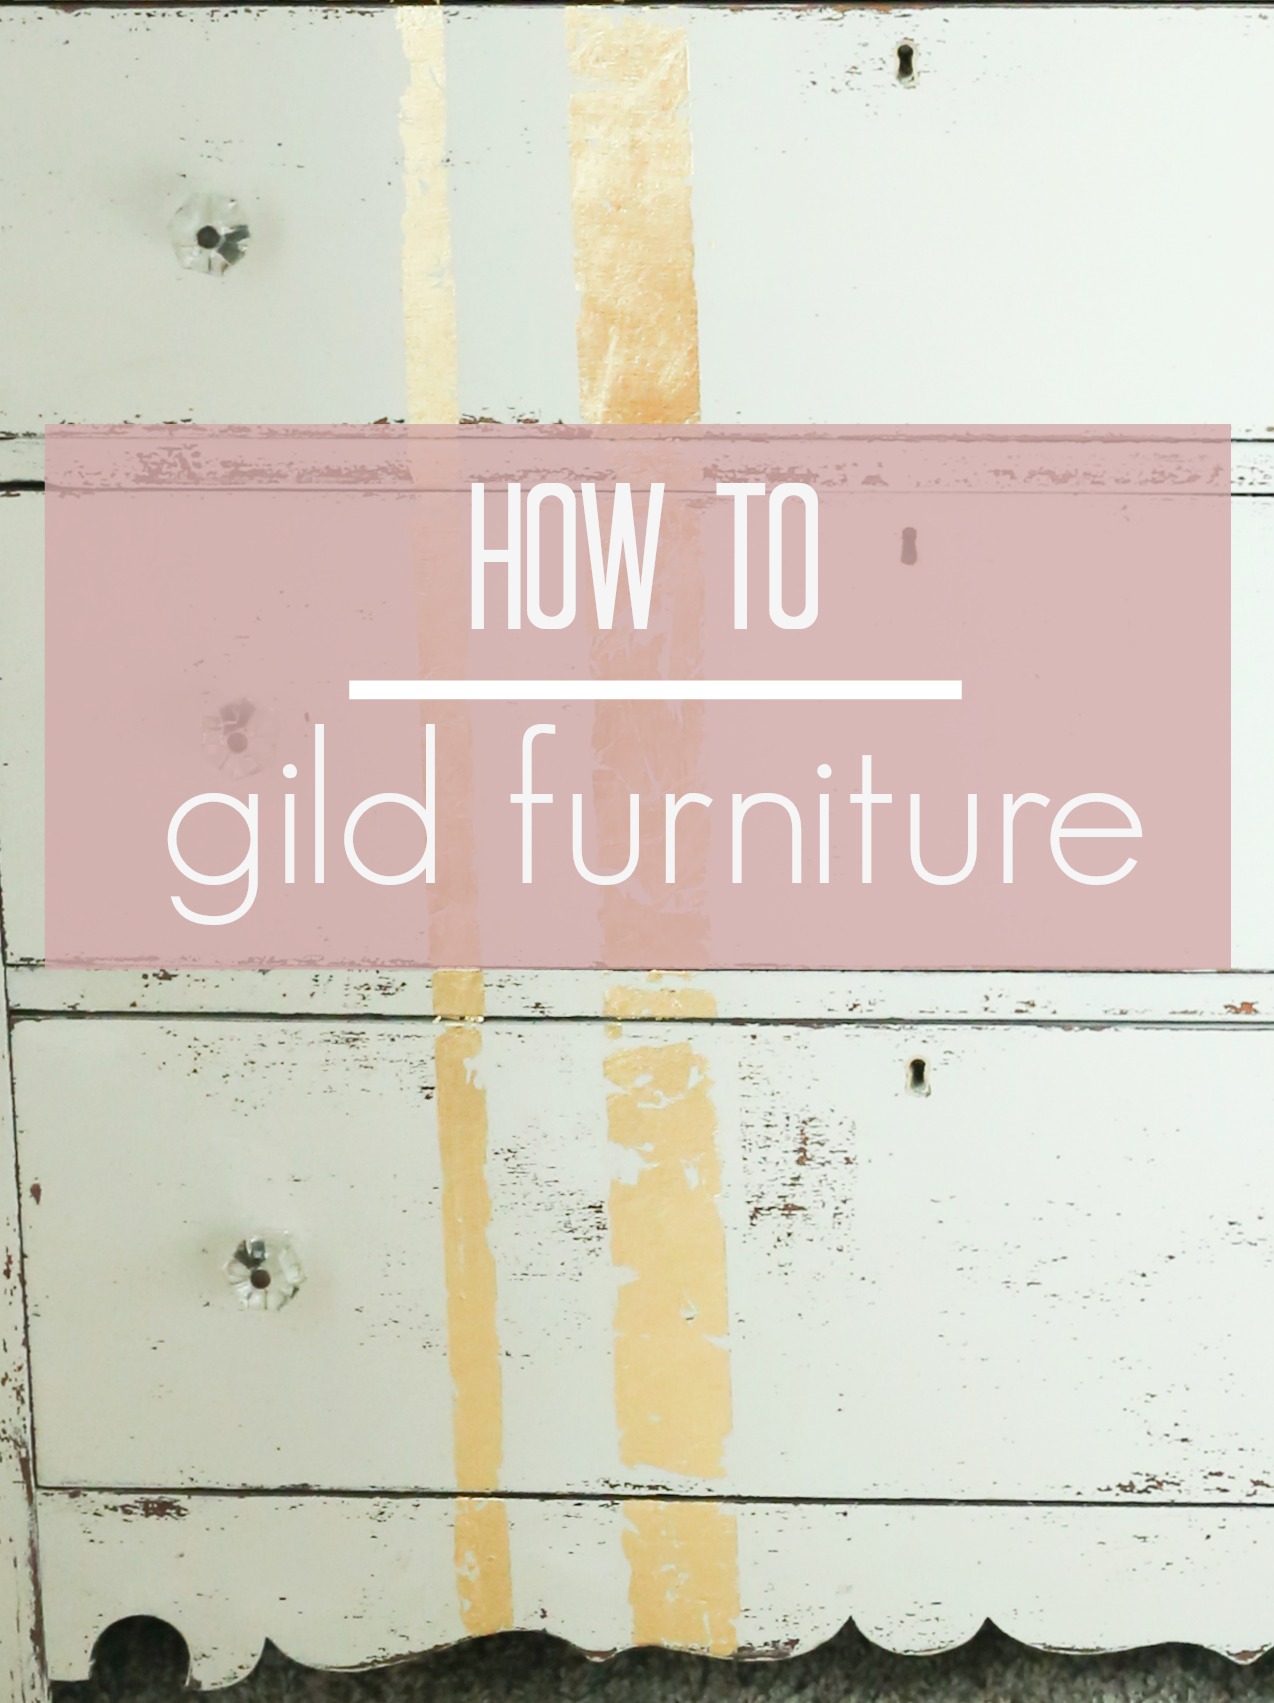
If you have ever wondered how to get that gold gilding look on your furniture then this is the post for you! Today I am going to share with you how I applied the gold leaf in 5 steps. If you have never worked with gold leafing before I would recommend trying it on a scrap piece of wood or a small object for the first time. You will need:
painters tape | gilding sheets | adhesive
| gilding brush set
| gilding gloves
| polyurethane {spray or liquid form}
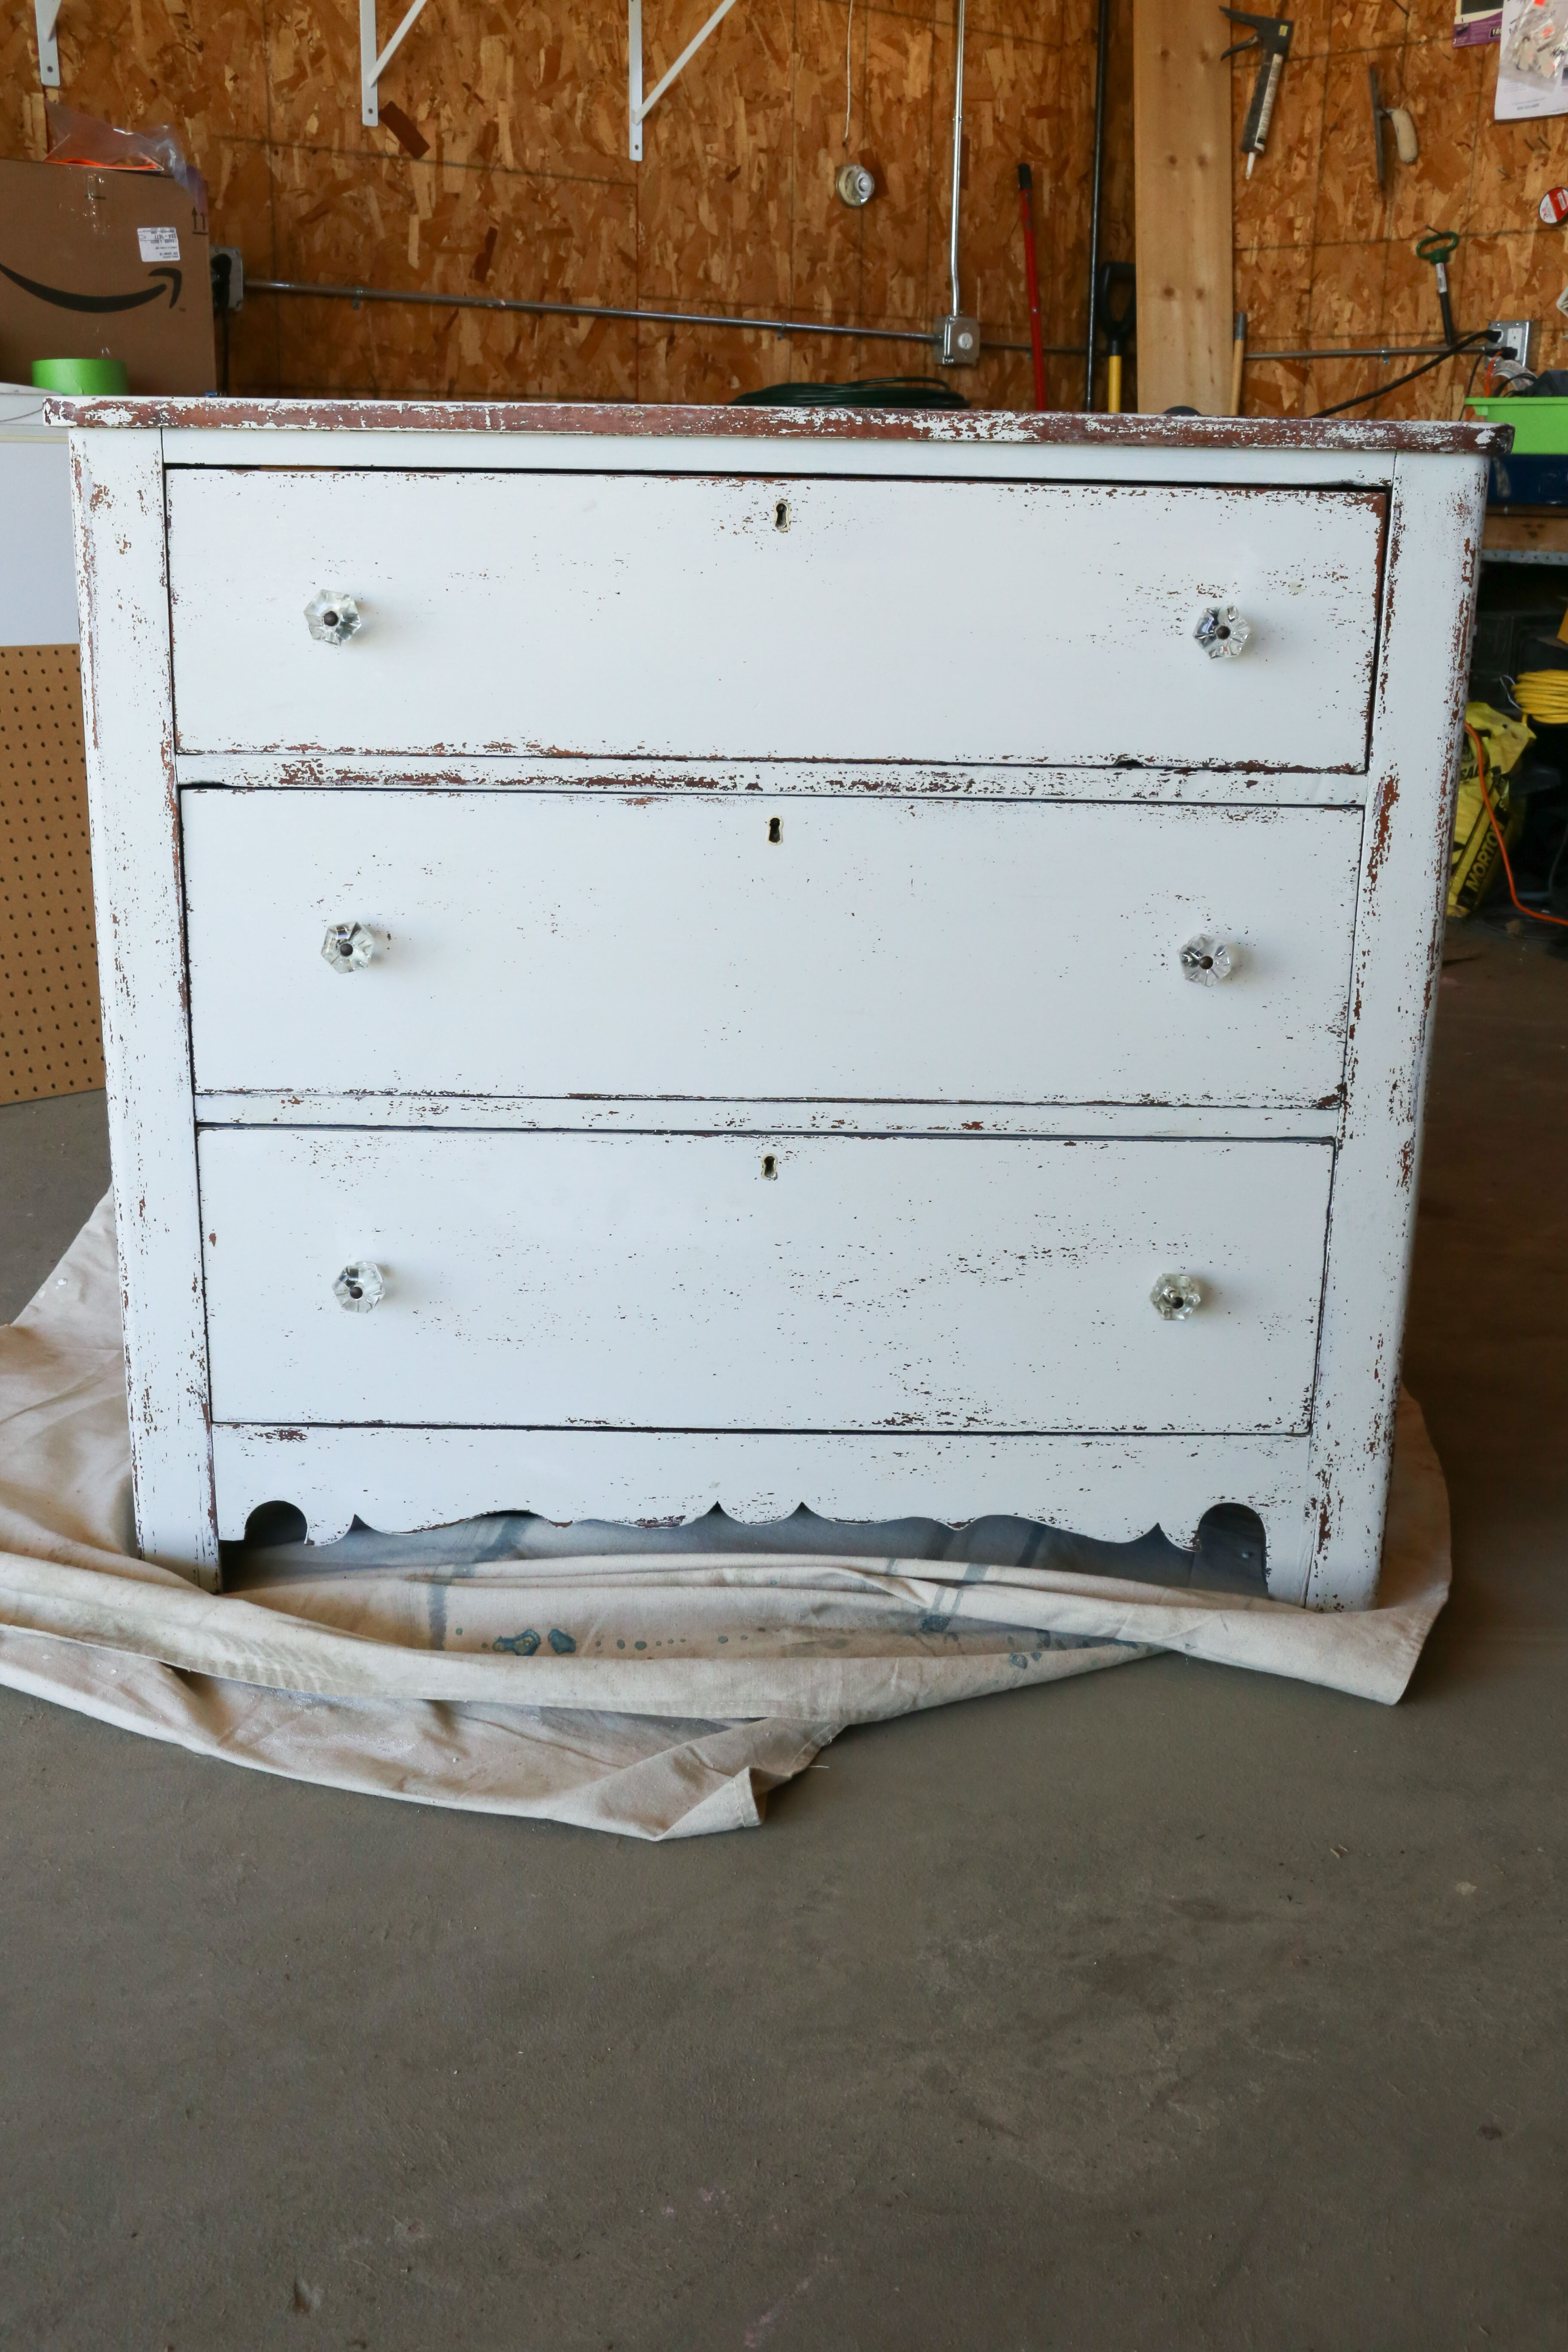
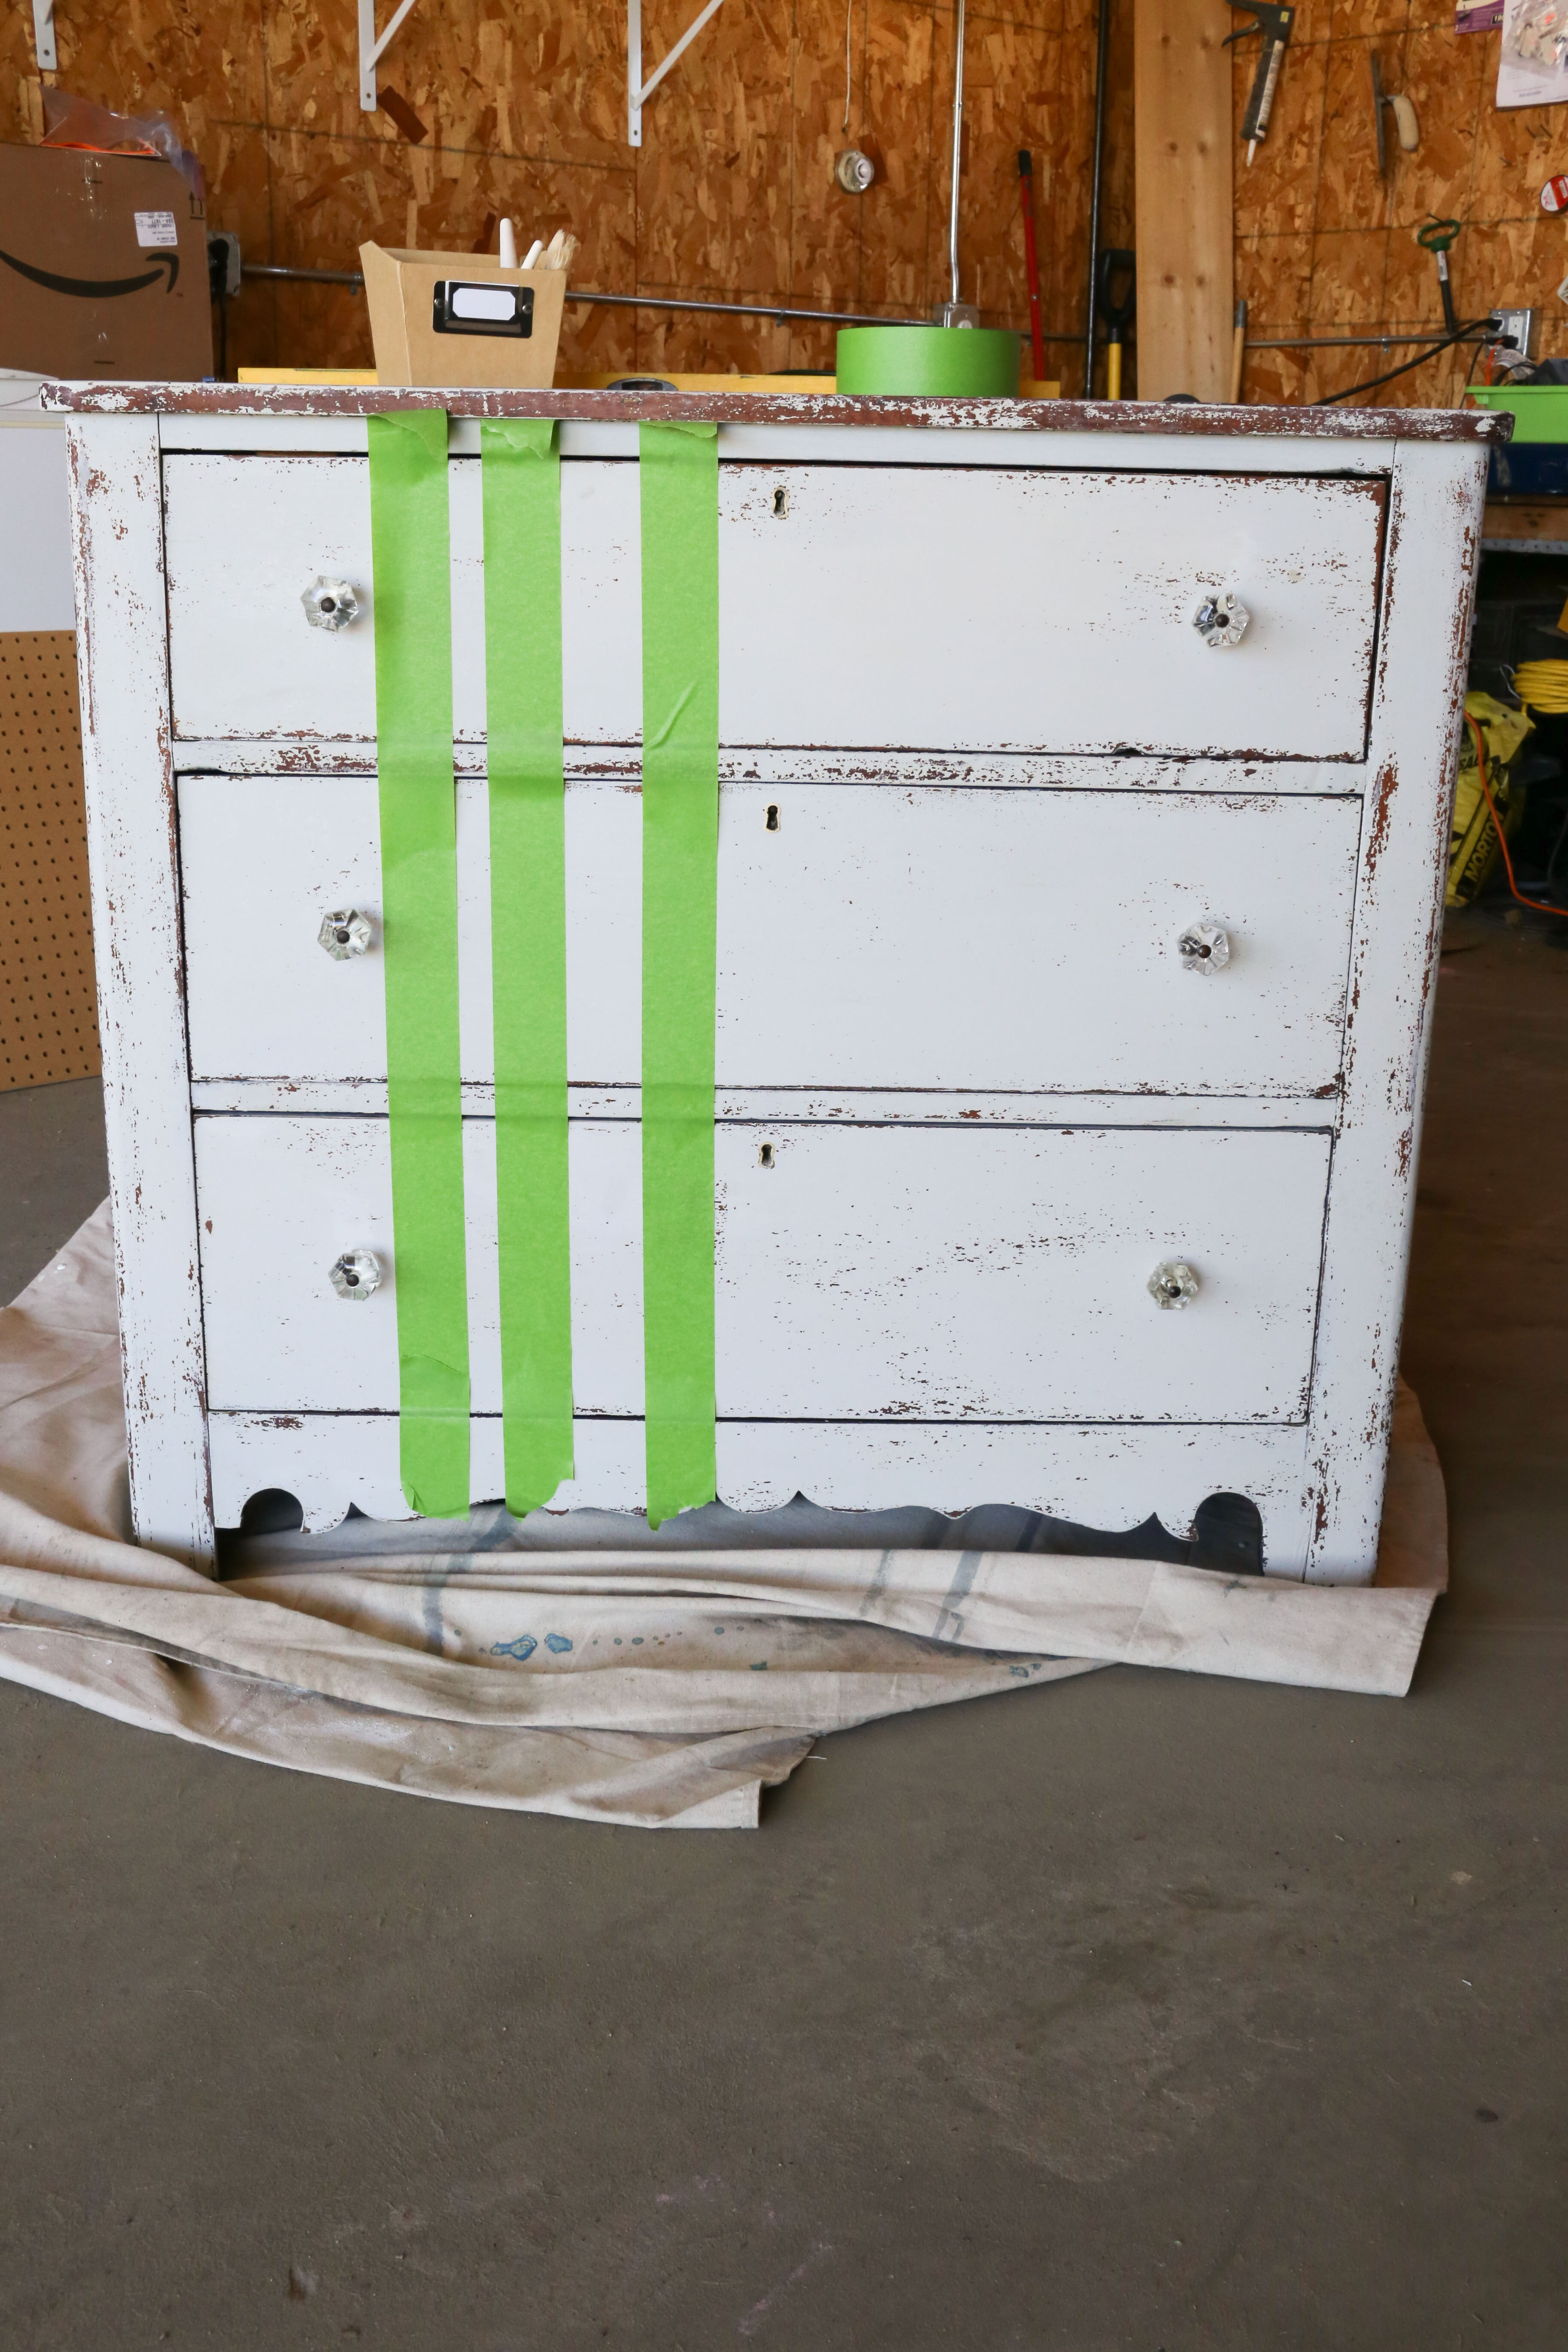
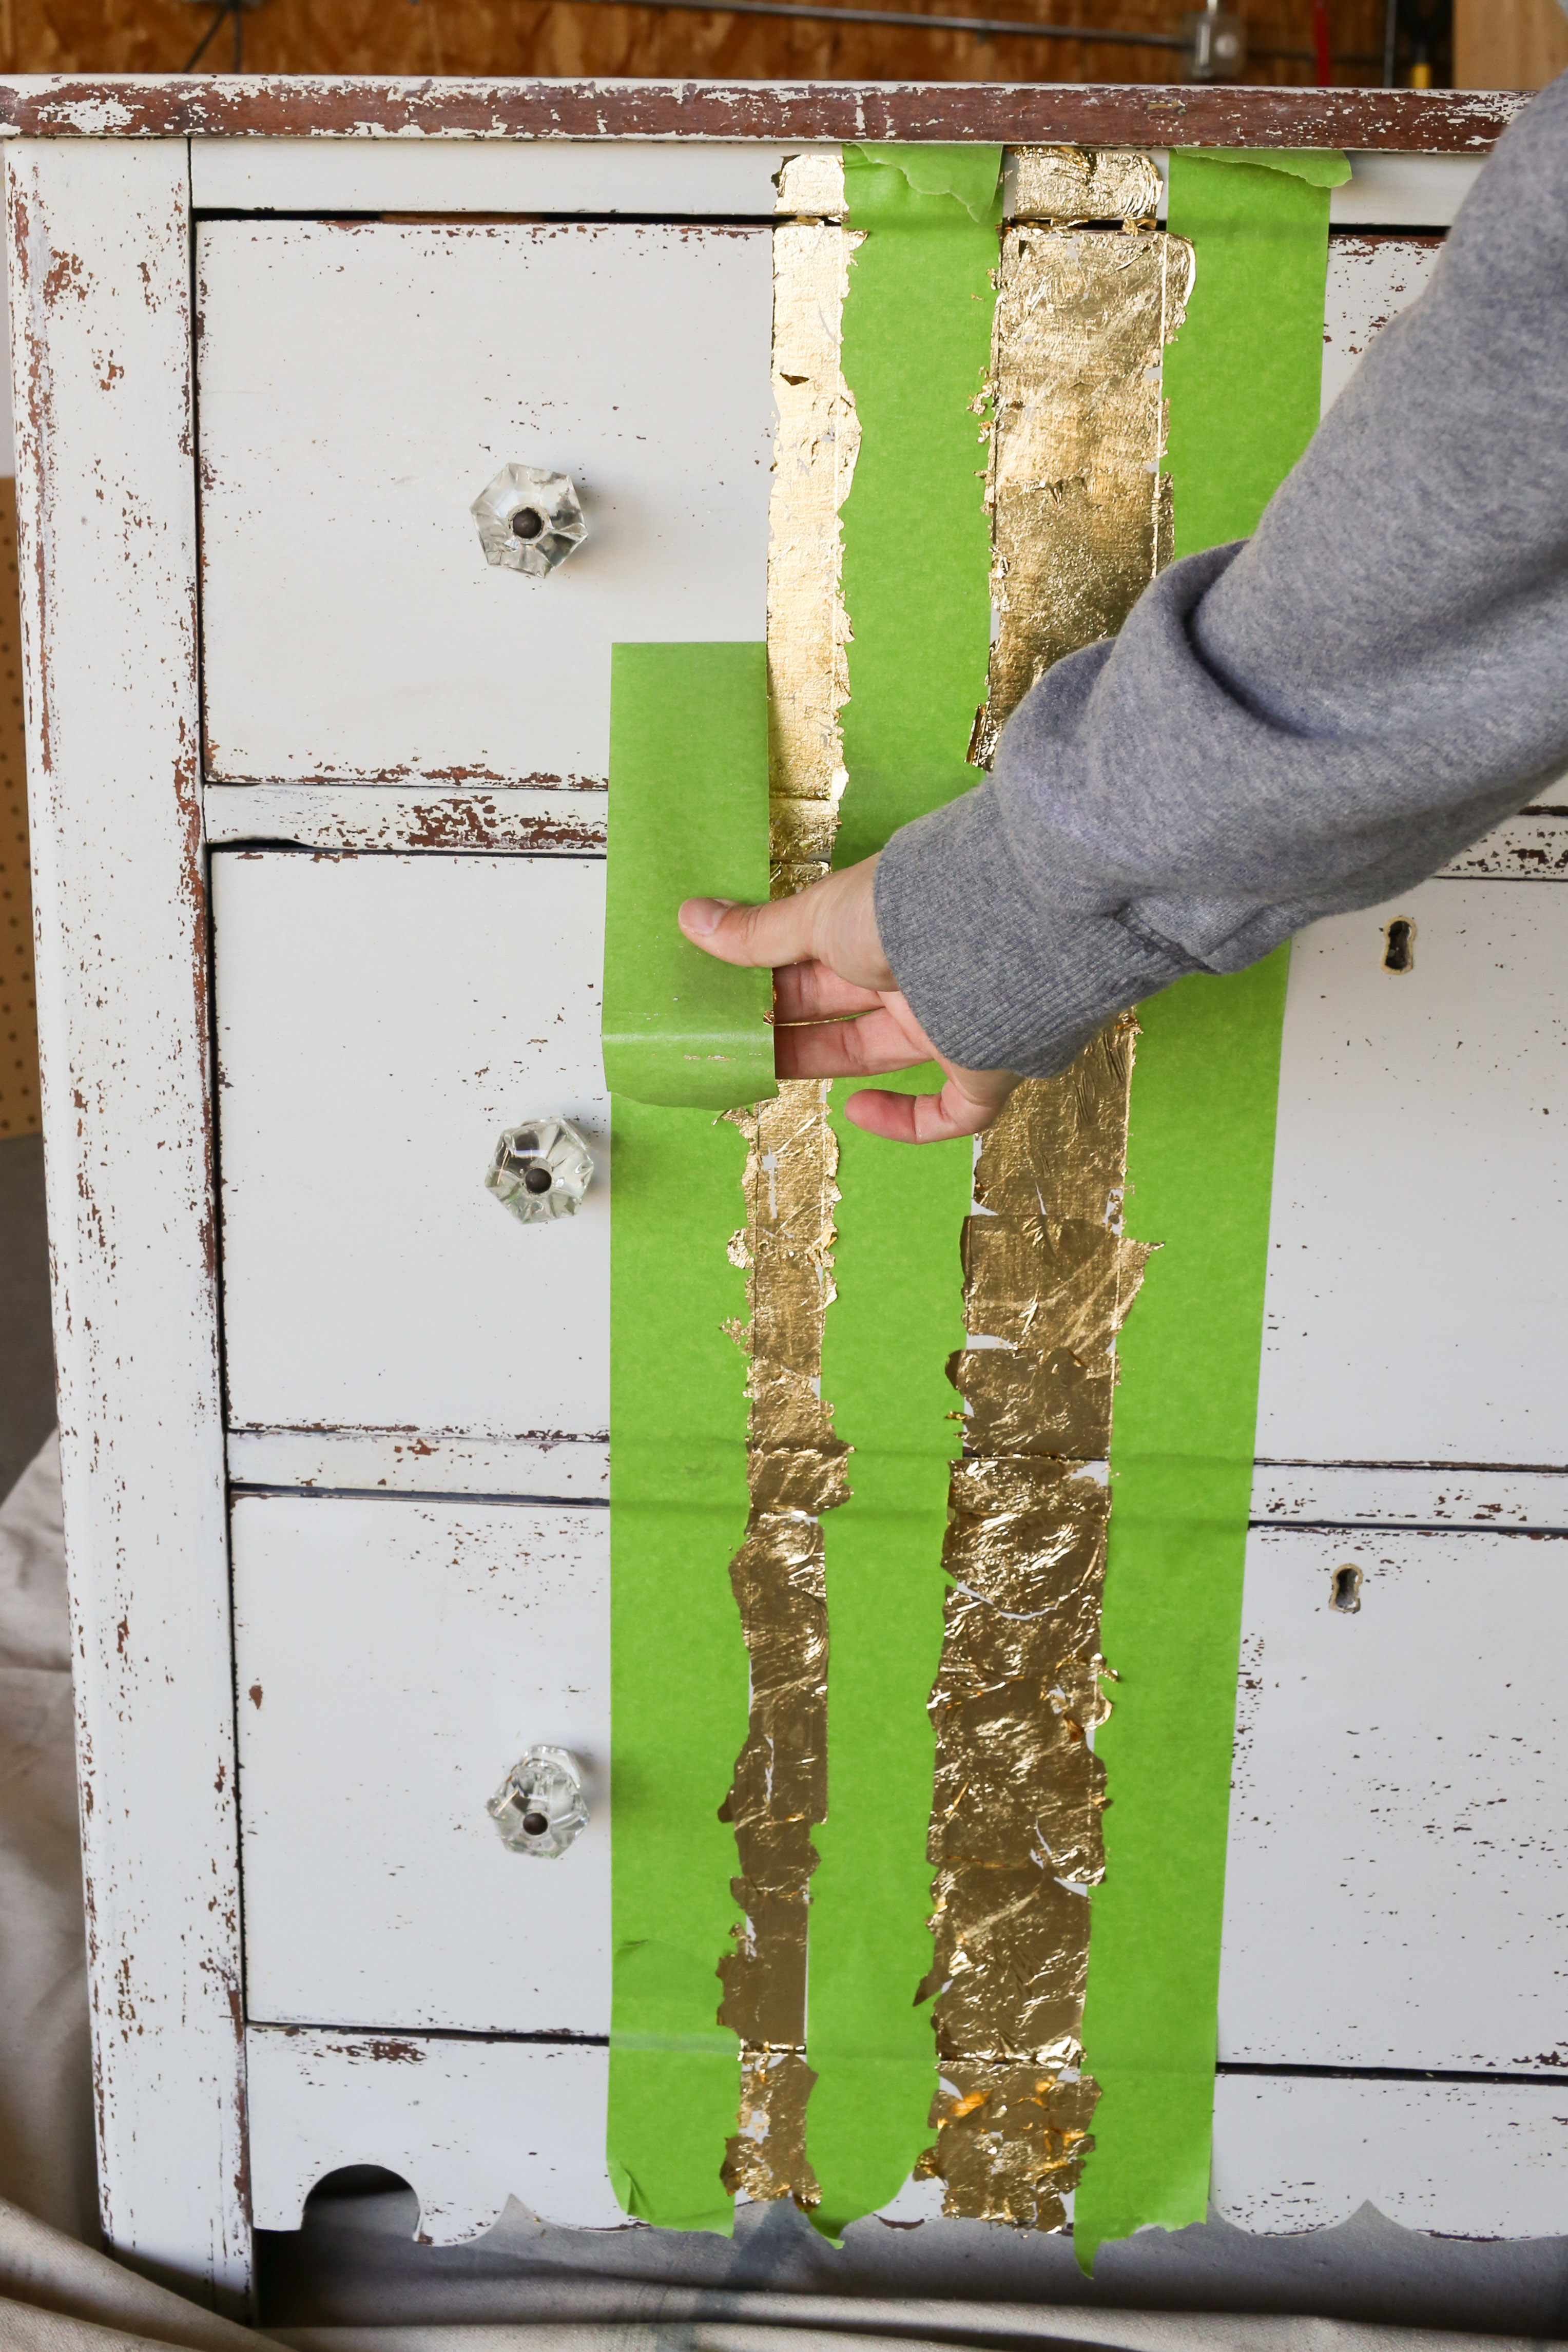
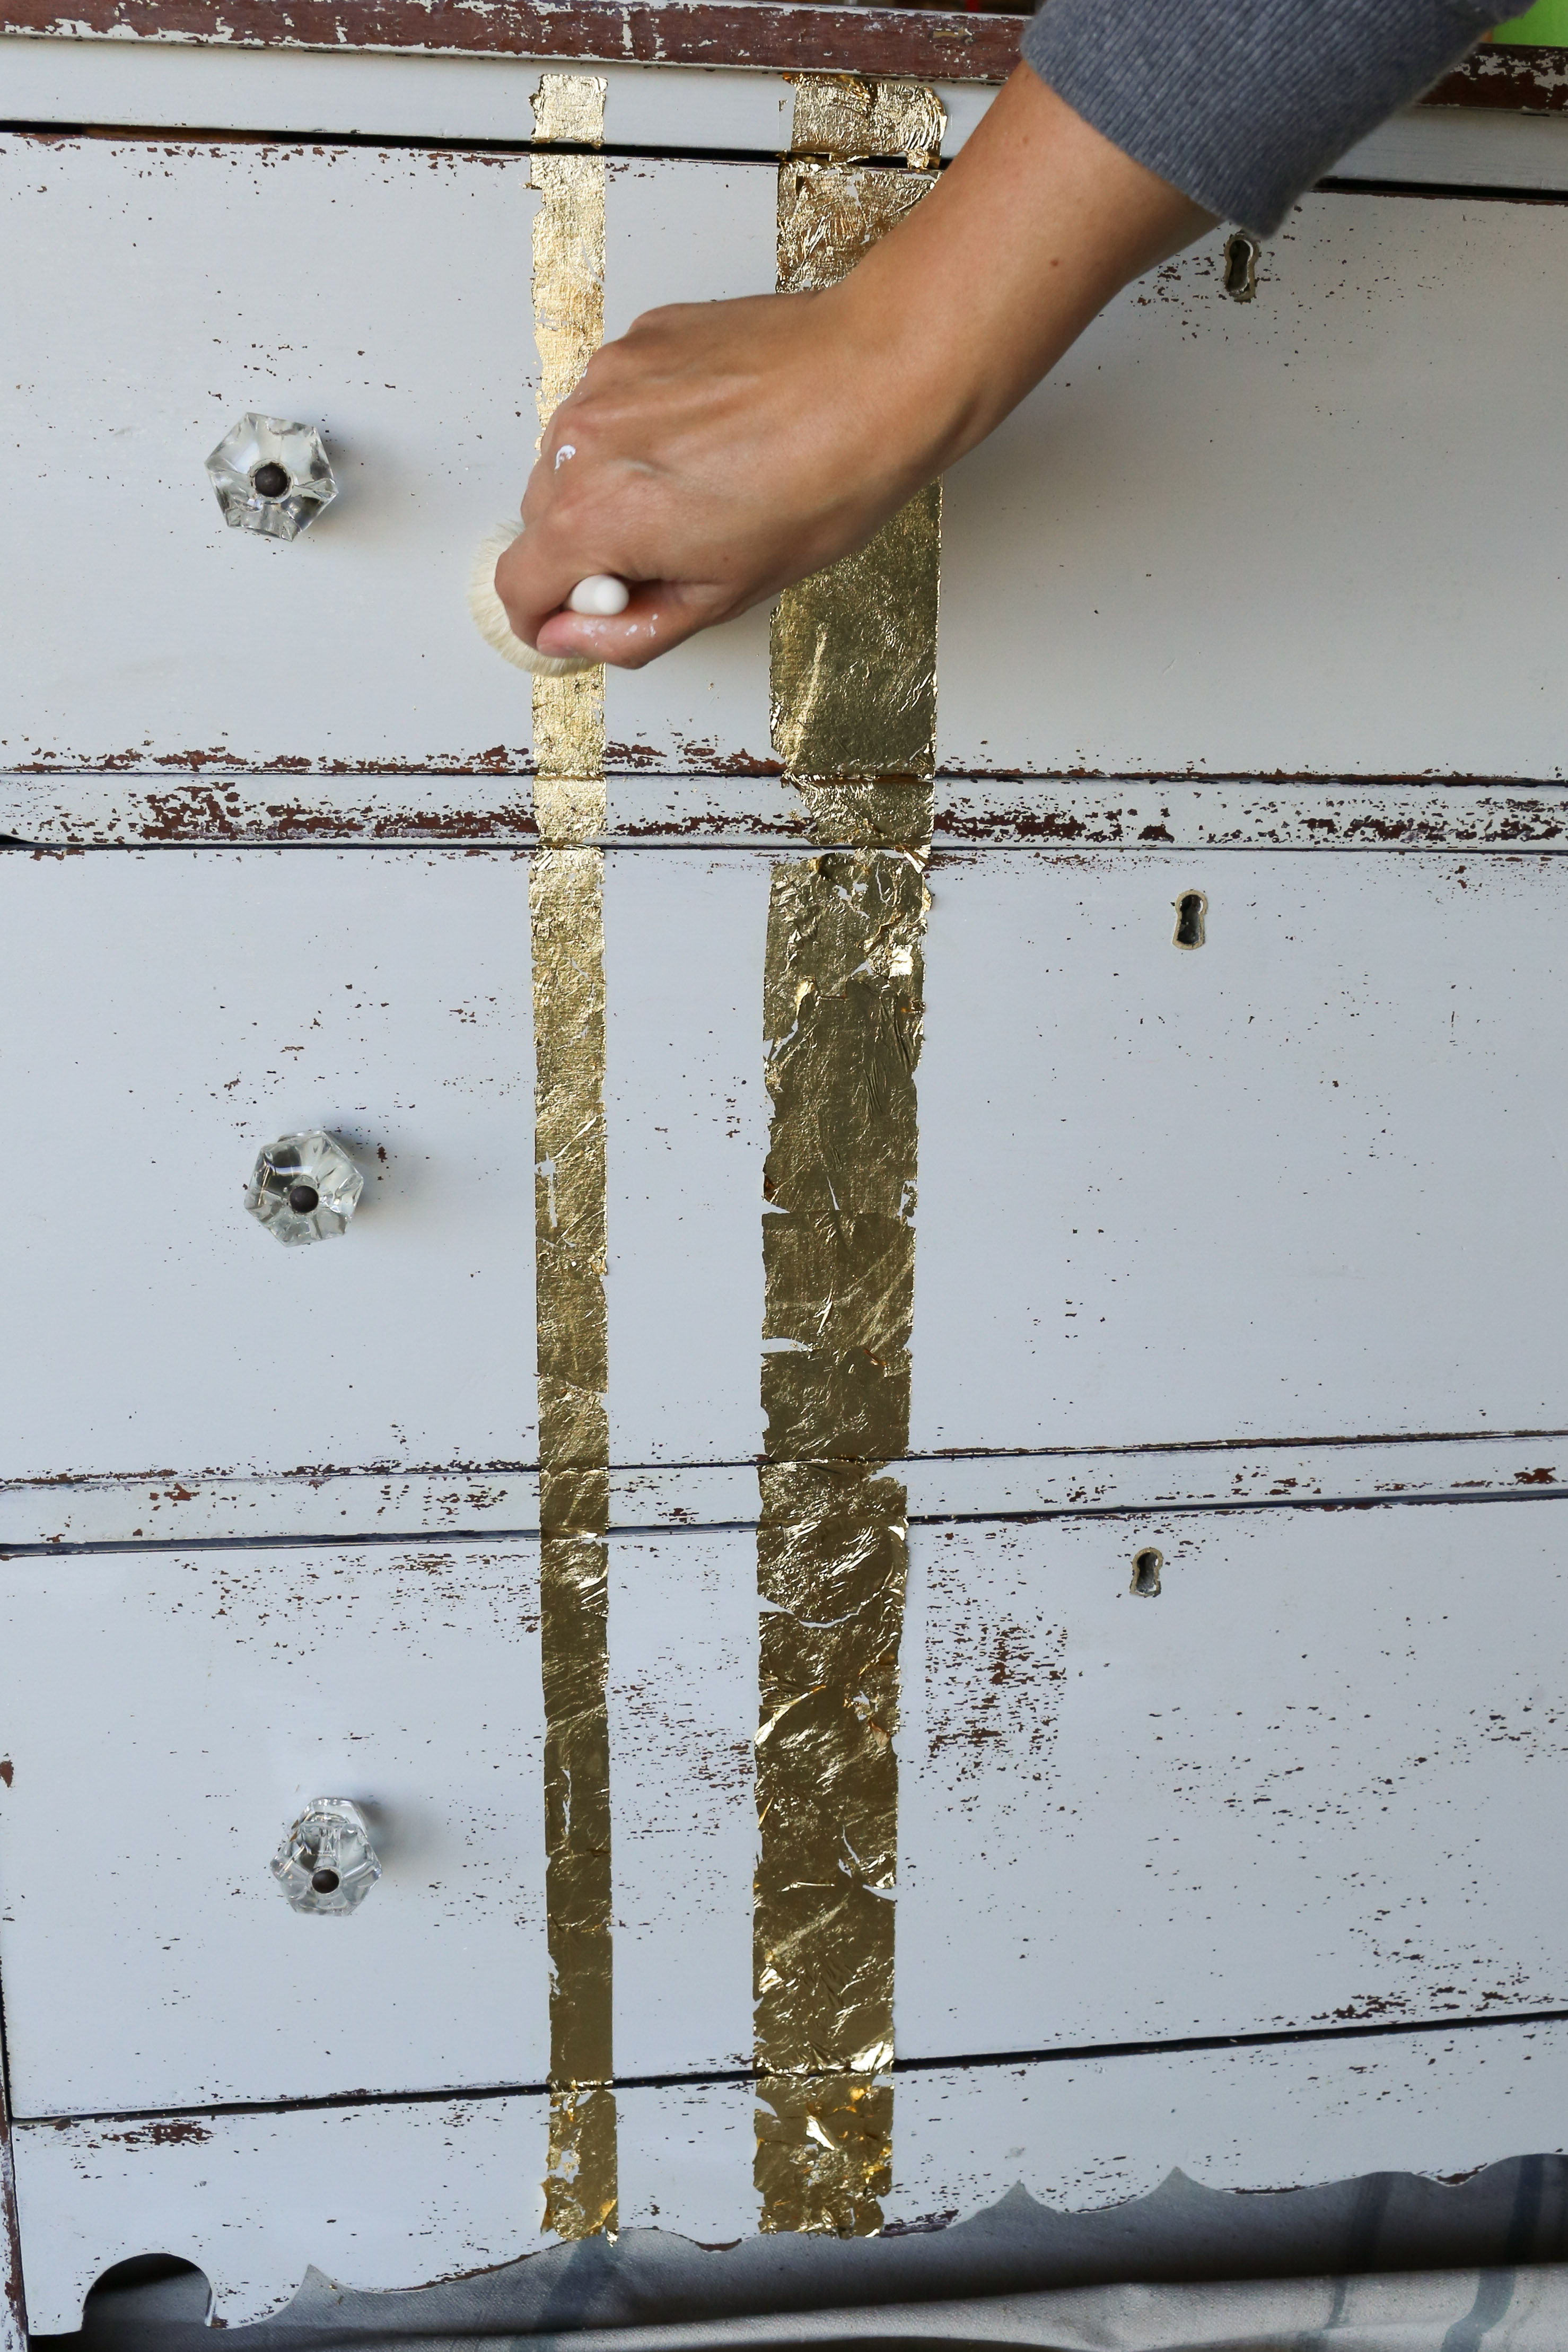
step one | Prepare the surface. Wipe with a cloth to make sure it is free of dirt. For this project I decided to do two stripes of gold so I used painters tape to create my stripes.
step two | Apply the gilding adhesive. Use a gilding brush to apply a thin layer of the adhesive. I worked in small sections. About a quarter of the surface at a time. Allow the adhesive to partially dry, until it feels tacky when you touch it. This took my piece about 10 minutes.
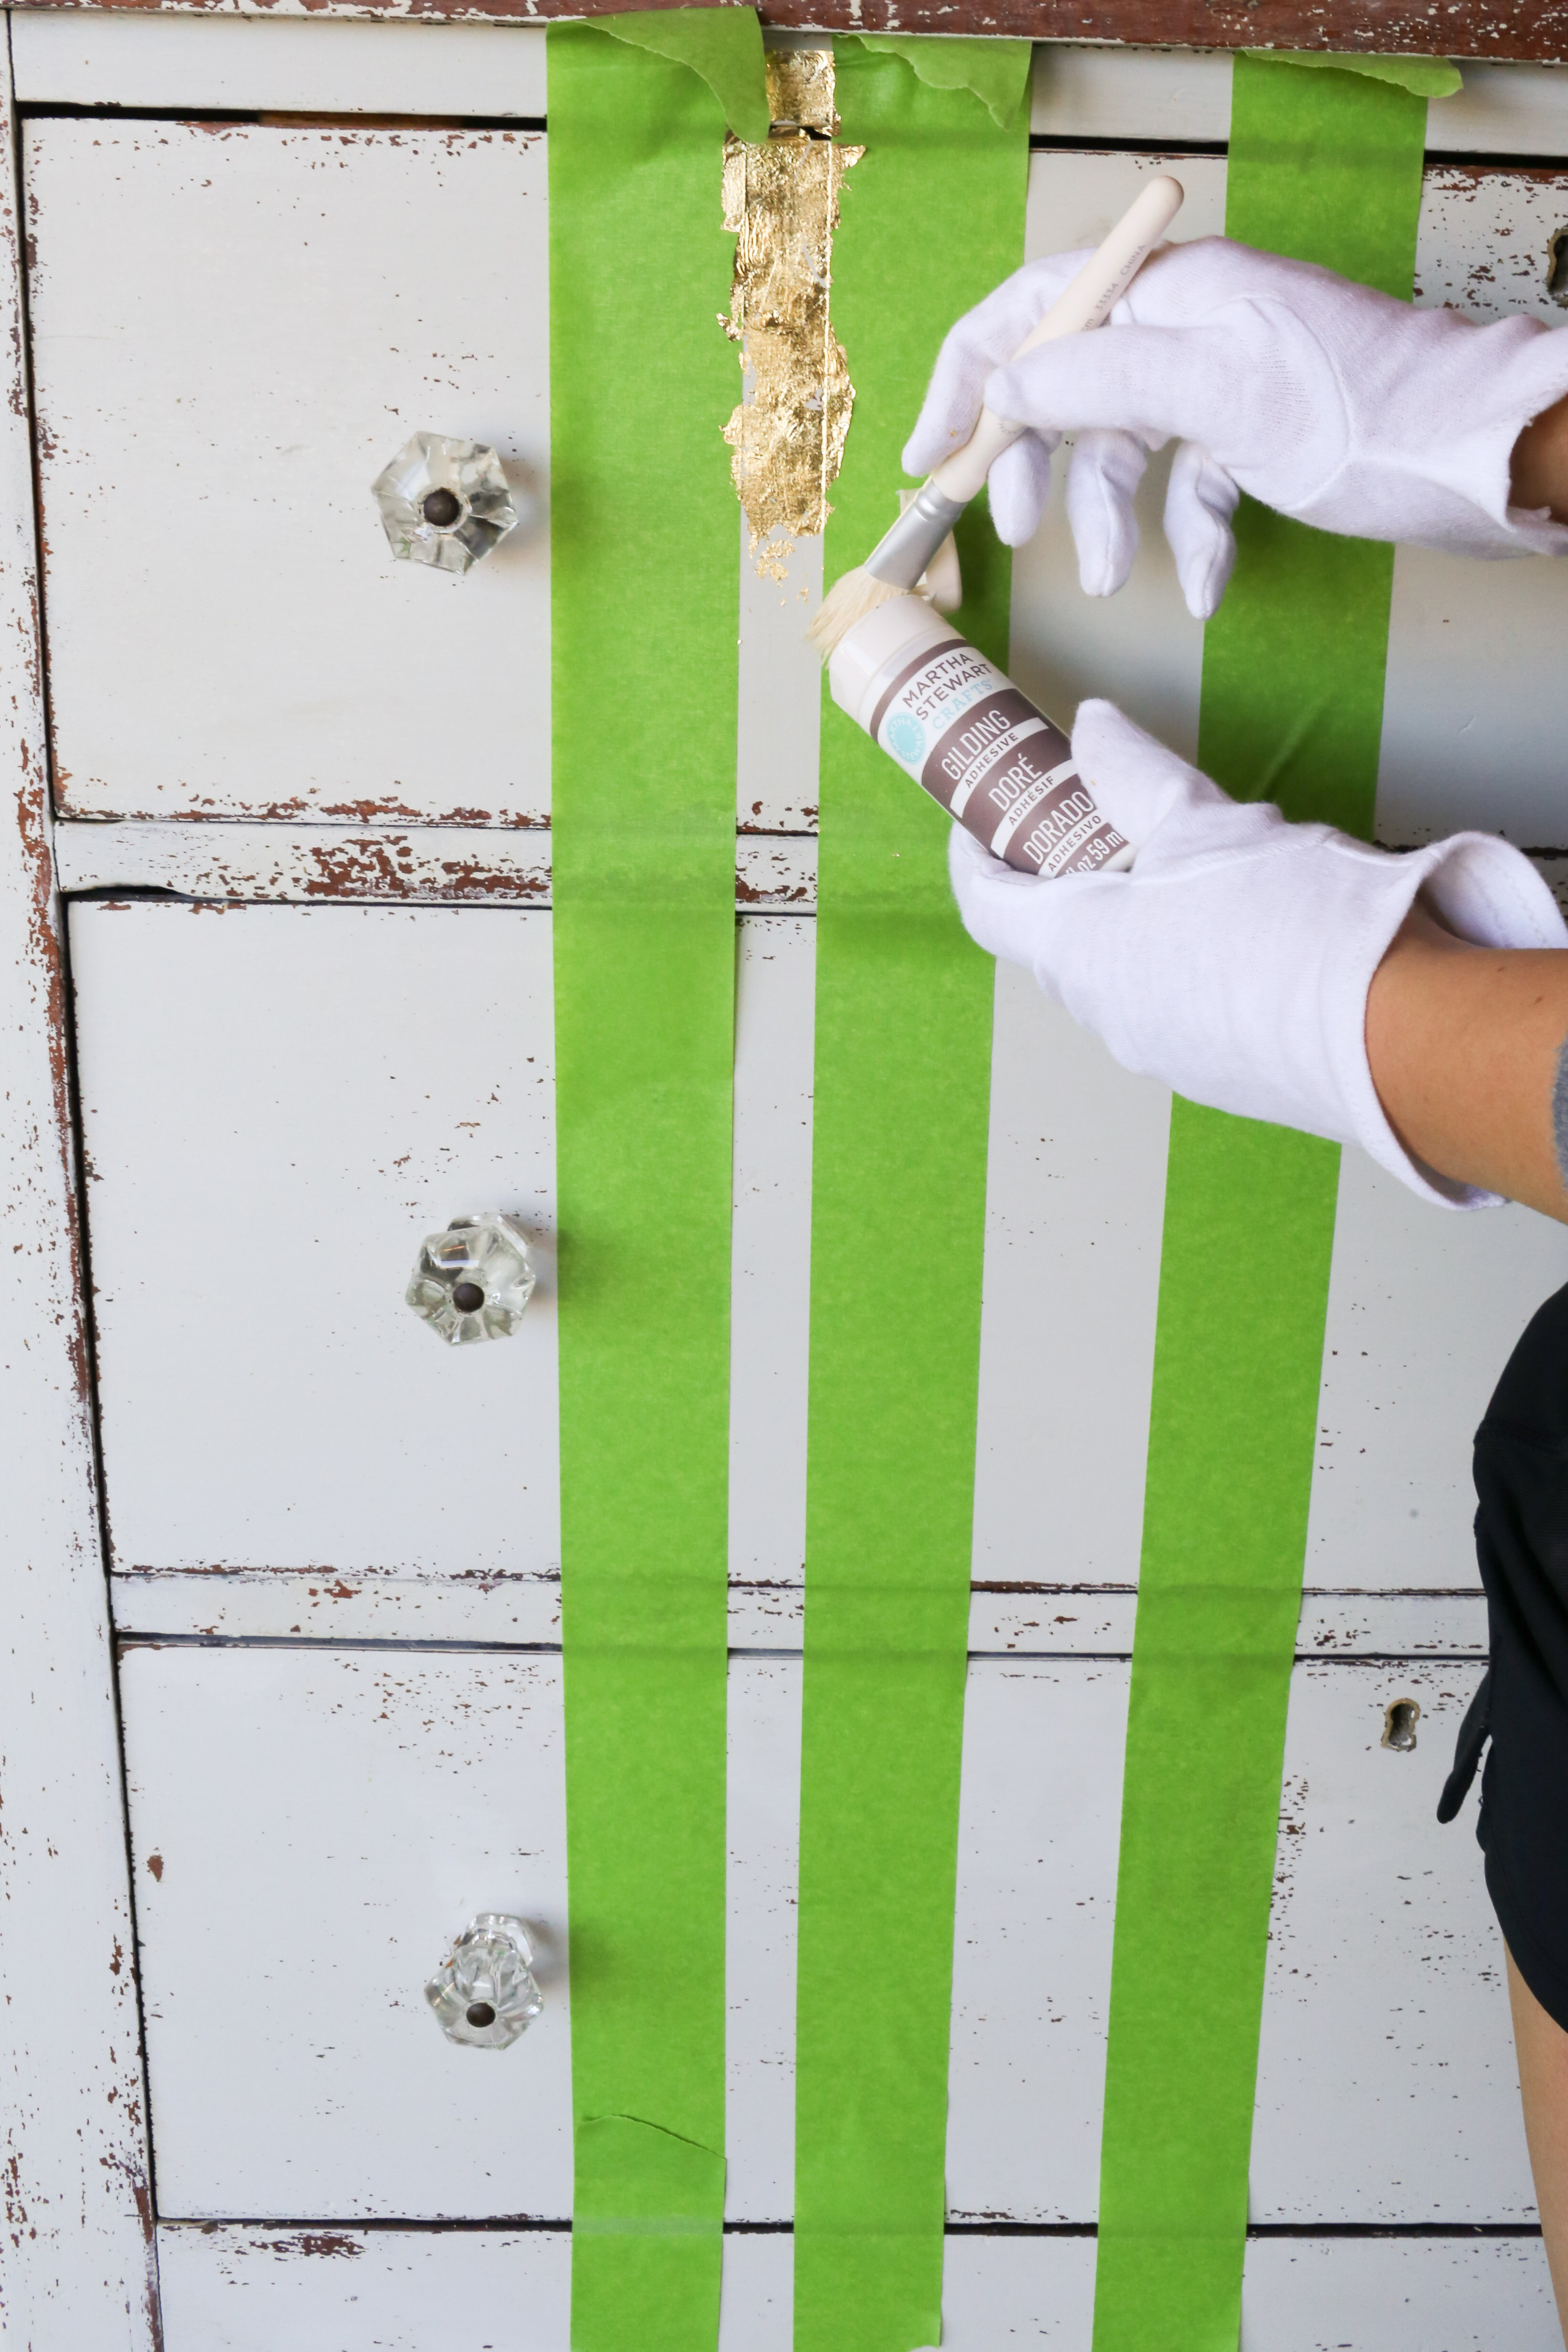
step three | Apply the gilding sheet. Make sure you are wearing the gloves for this part so that the oils on your fingers will not get on the gold gilding sheet. Press the sheet onto the adhesive. Gently rub the sheet to make sure it is sticking to the adhesive. Then slowly pull the sheet back from the area with the adhesive. The sheet of gold gilding will gently rip, leaving gold gilding on the area with the adhesive. Repeat with the same sheet of gold gilding until you have used up the entire sheet.
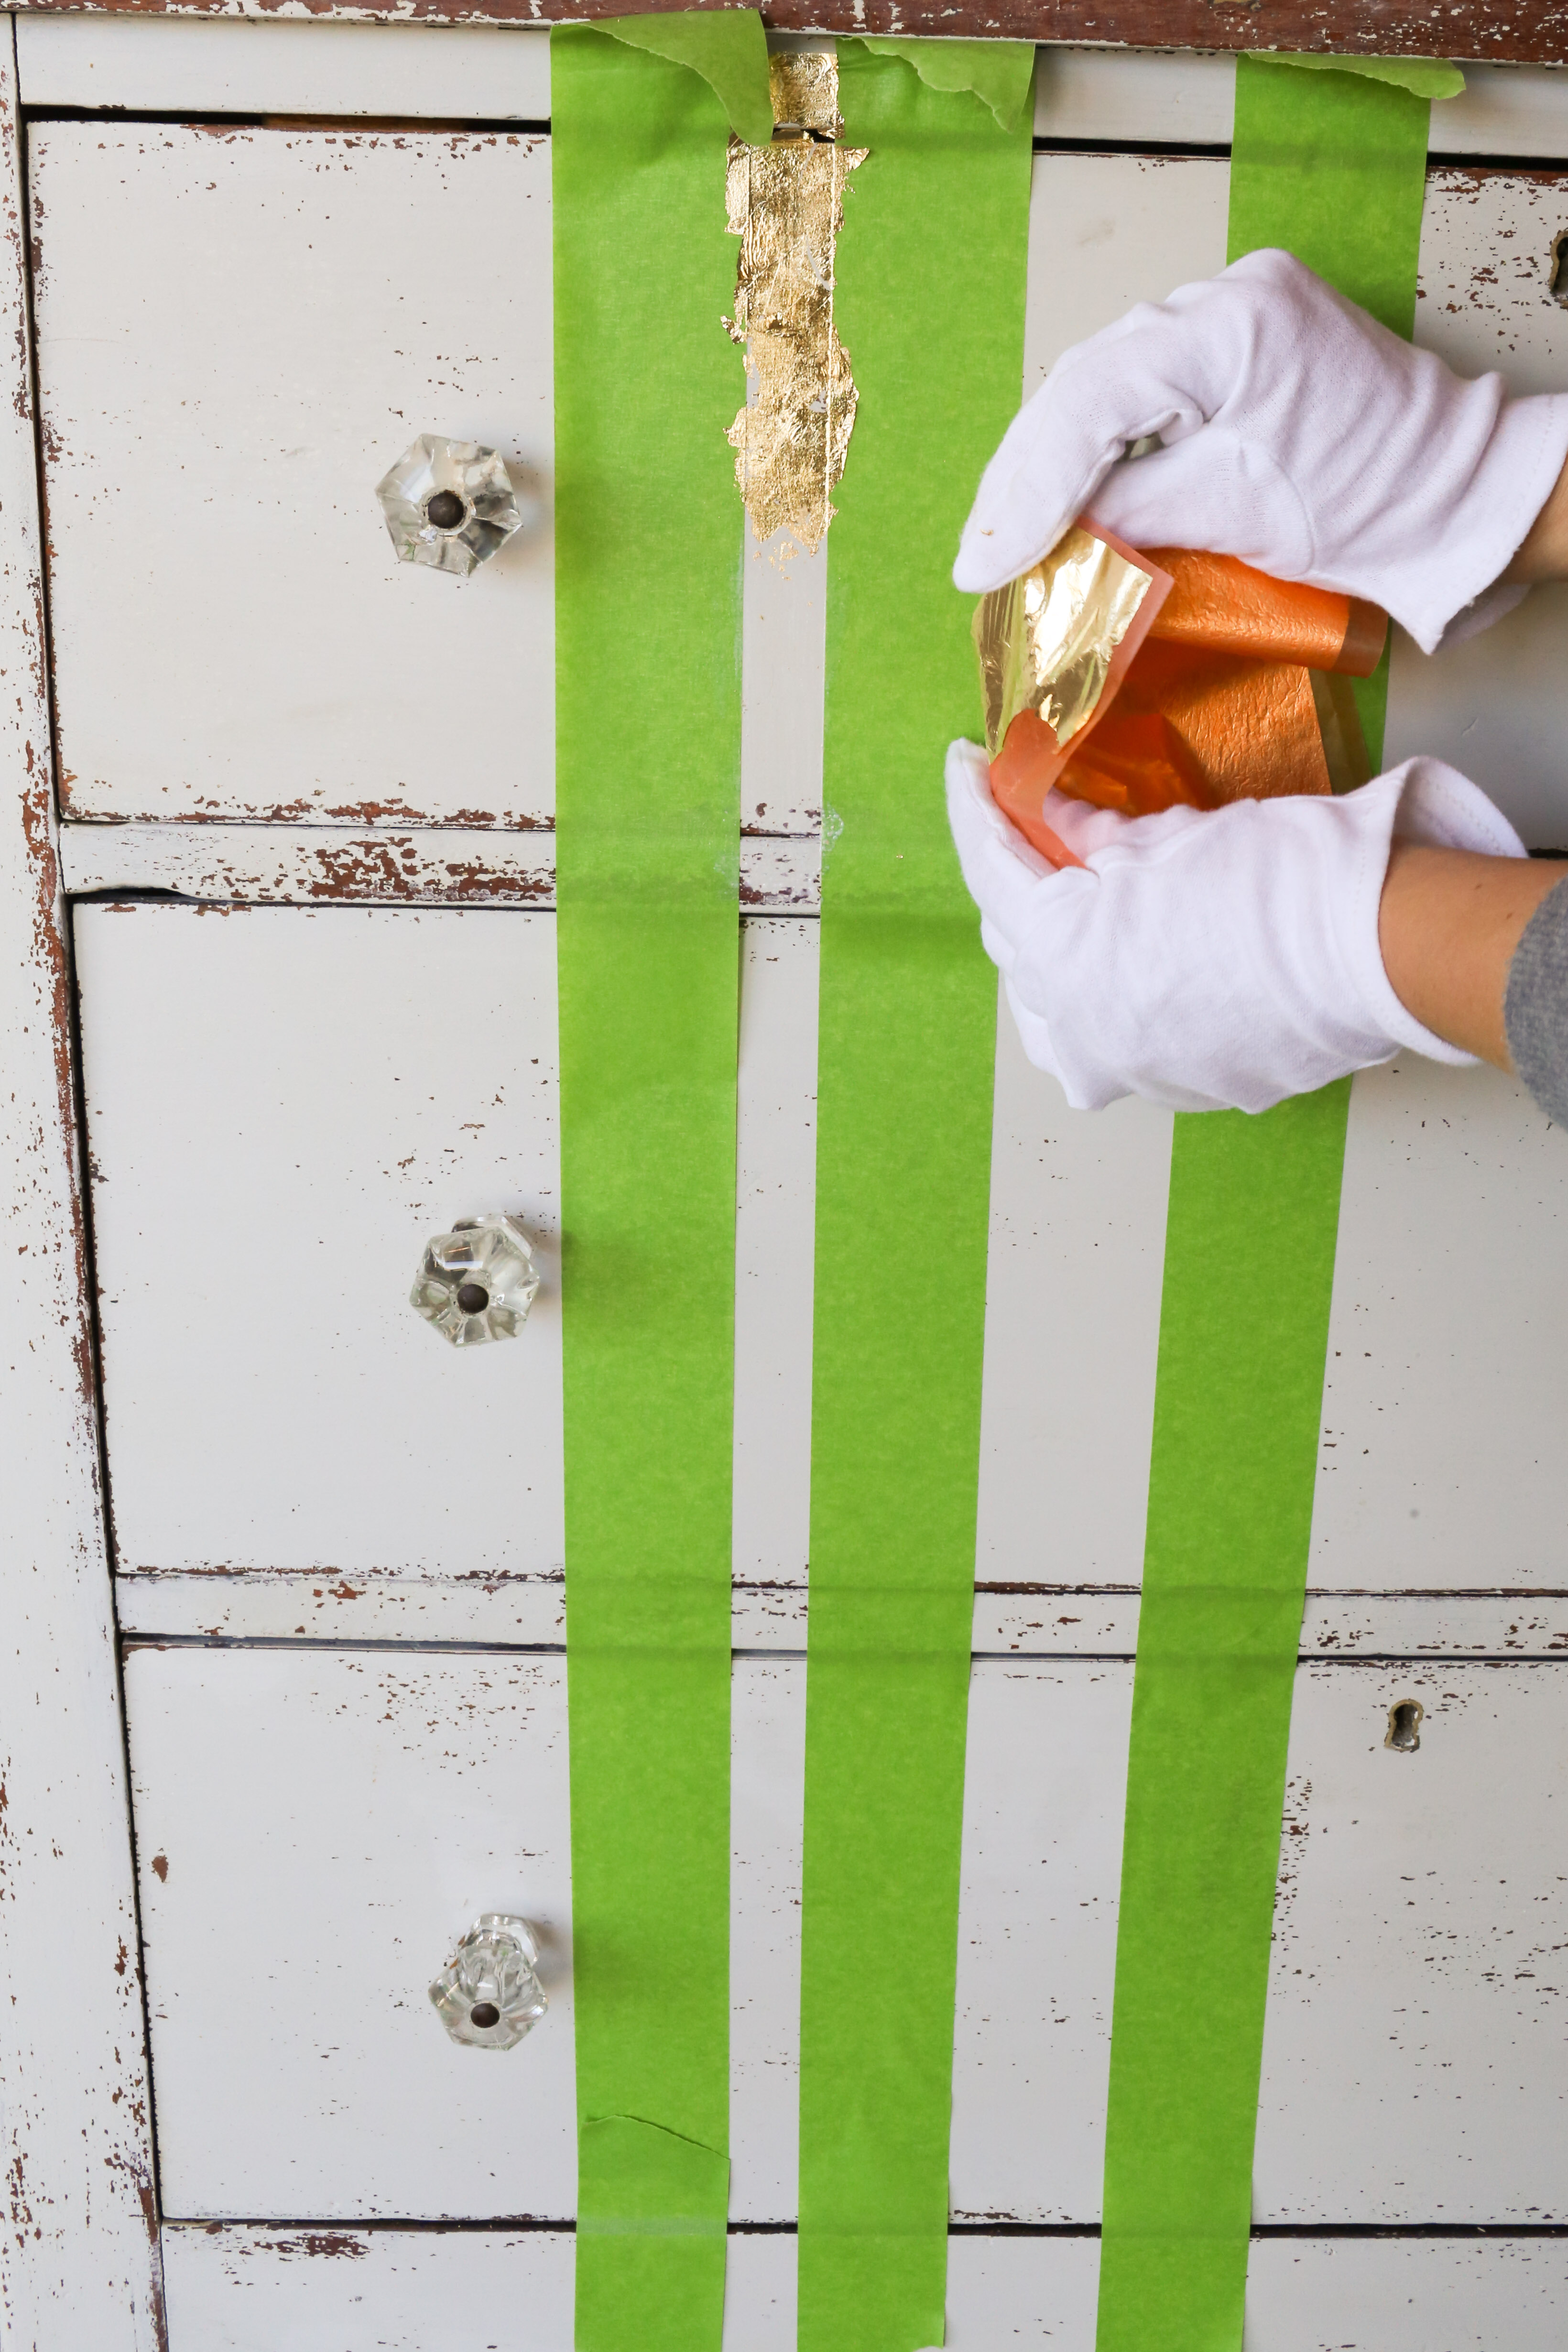
Continue applying the adhesive and then the gilding until you have covered the entire area. Allow to dry for two hours.
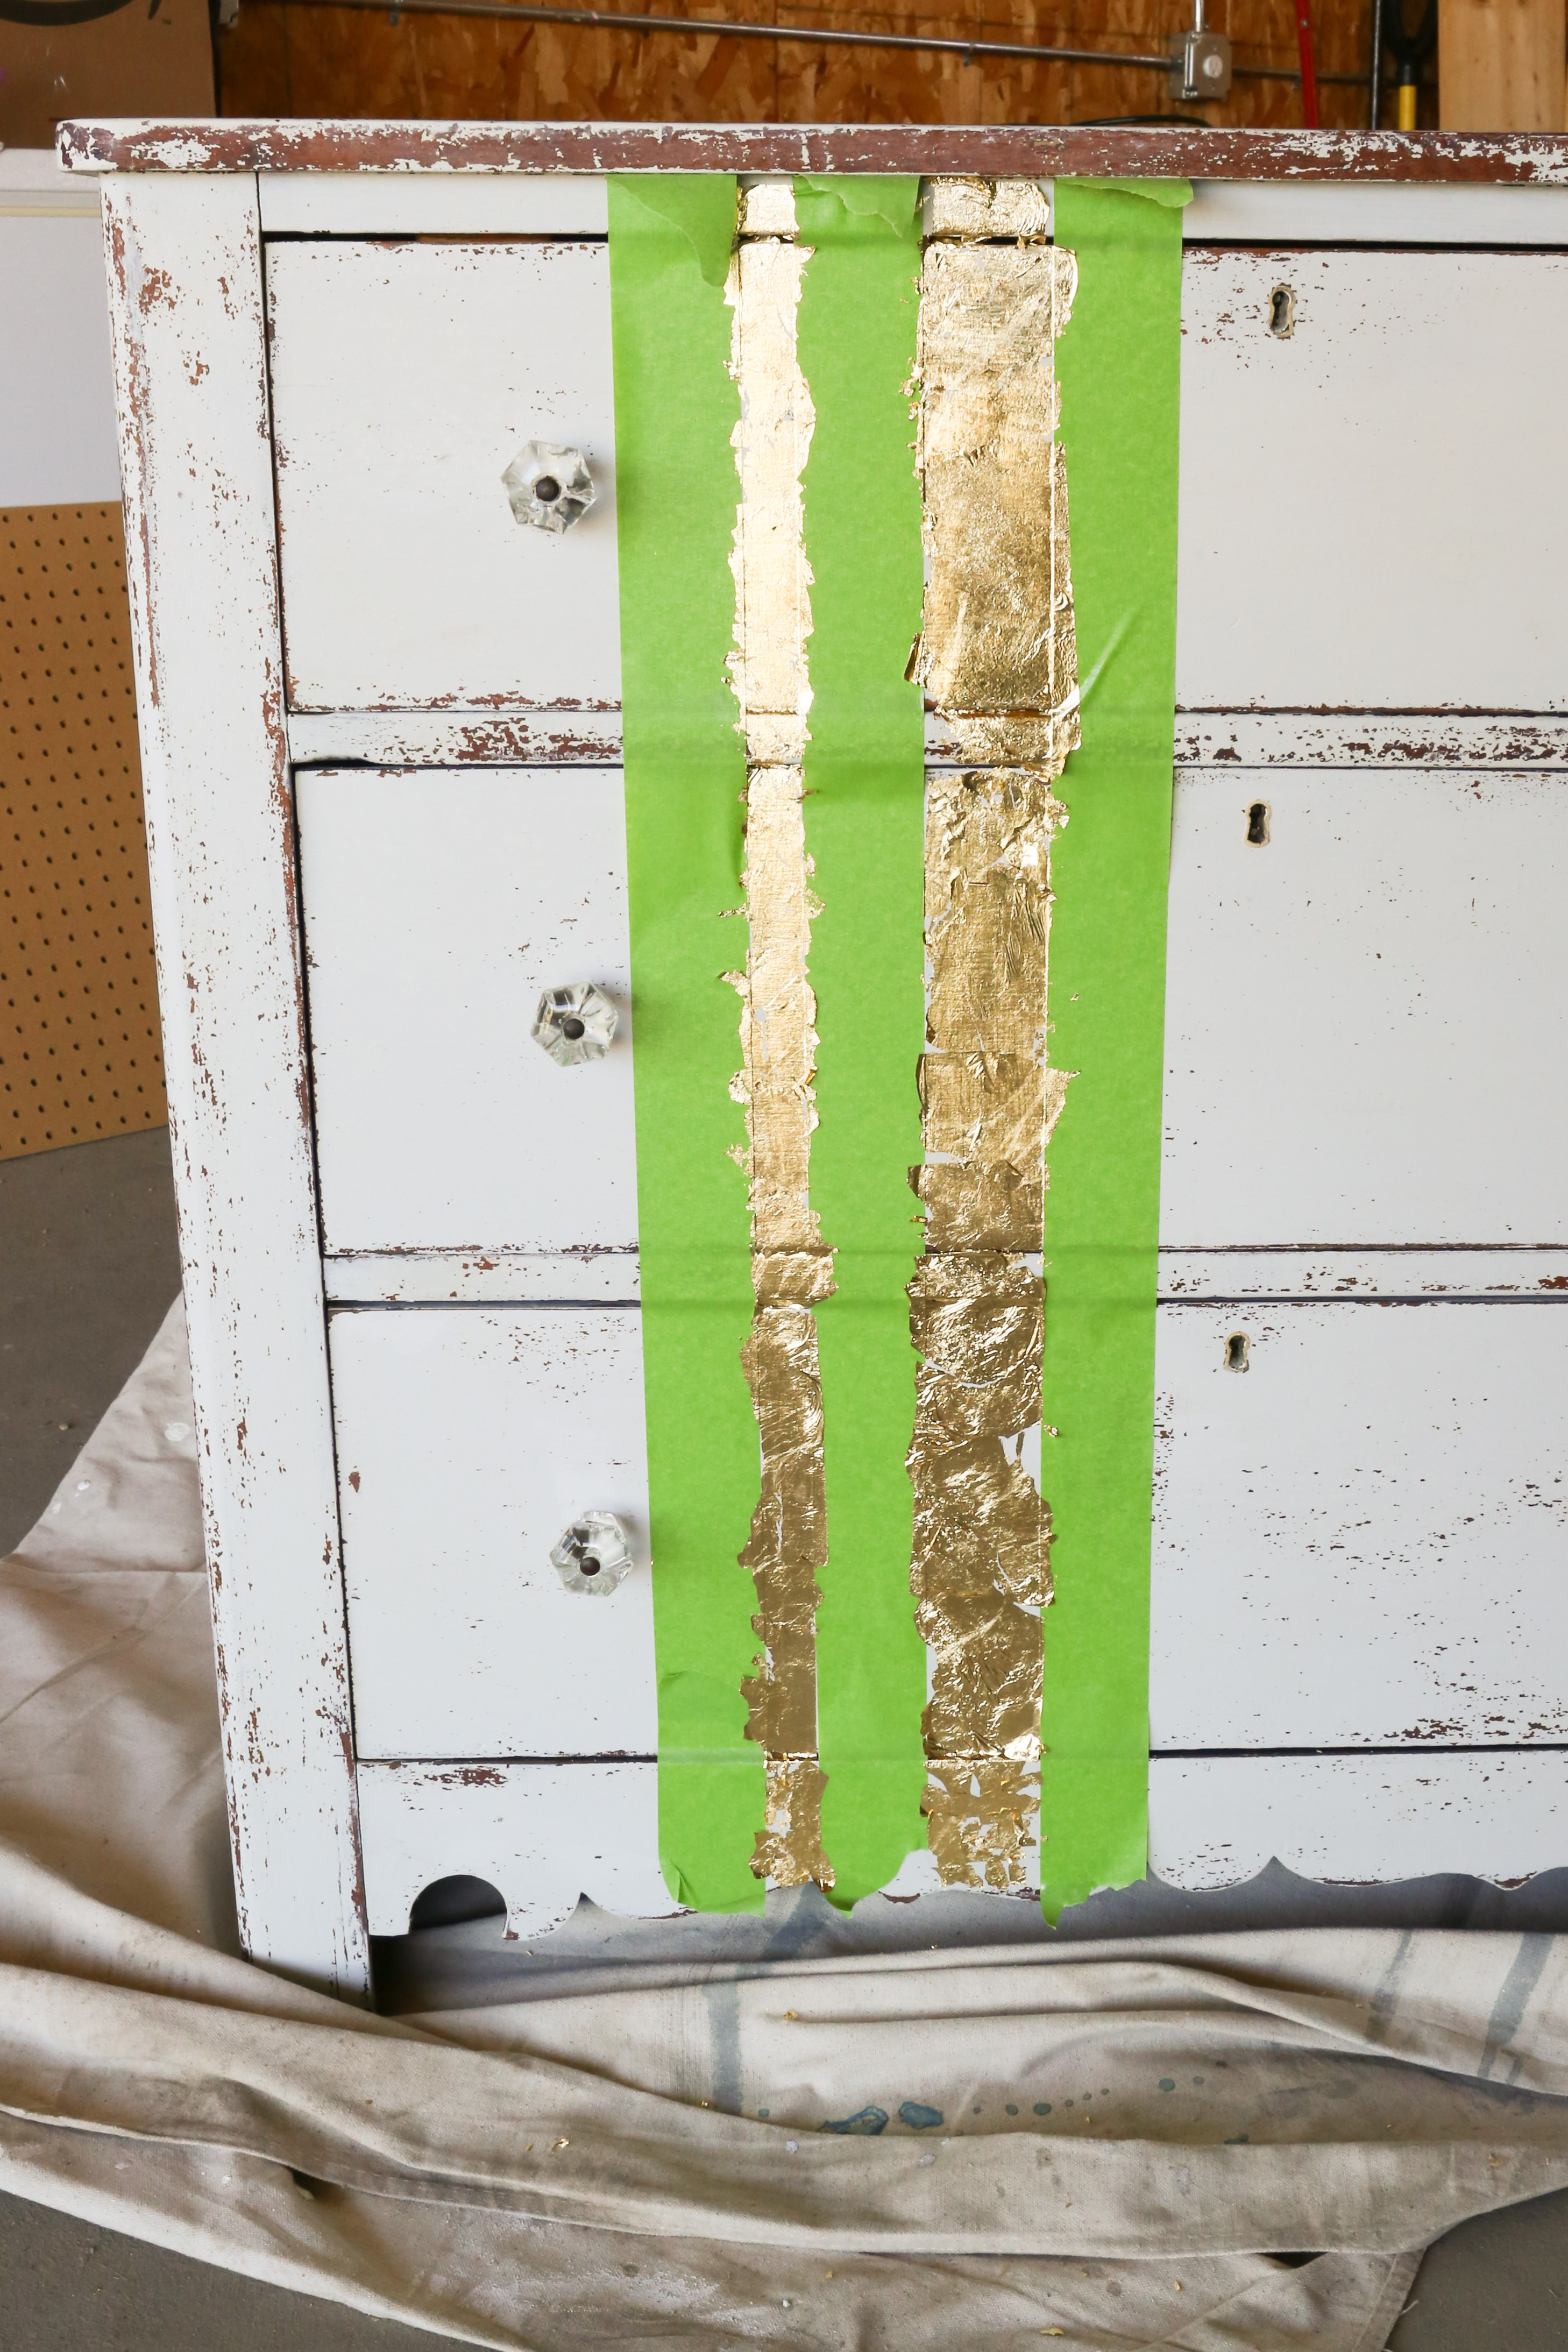
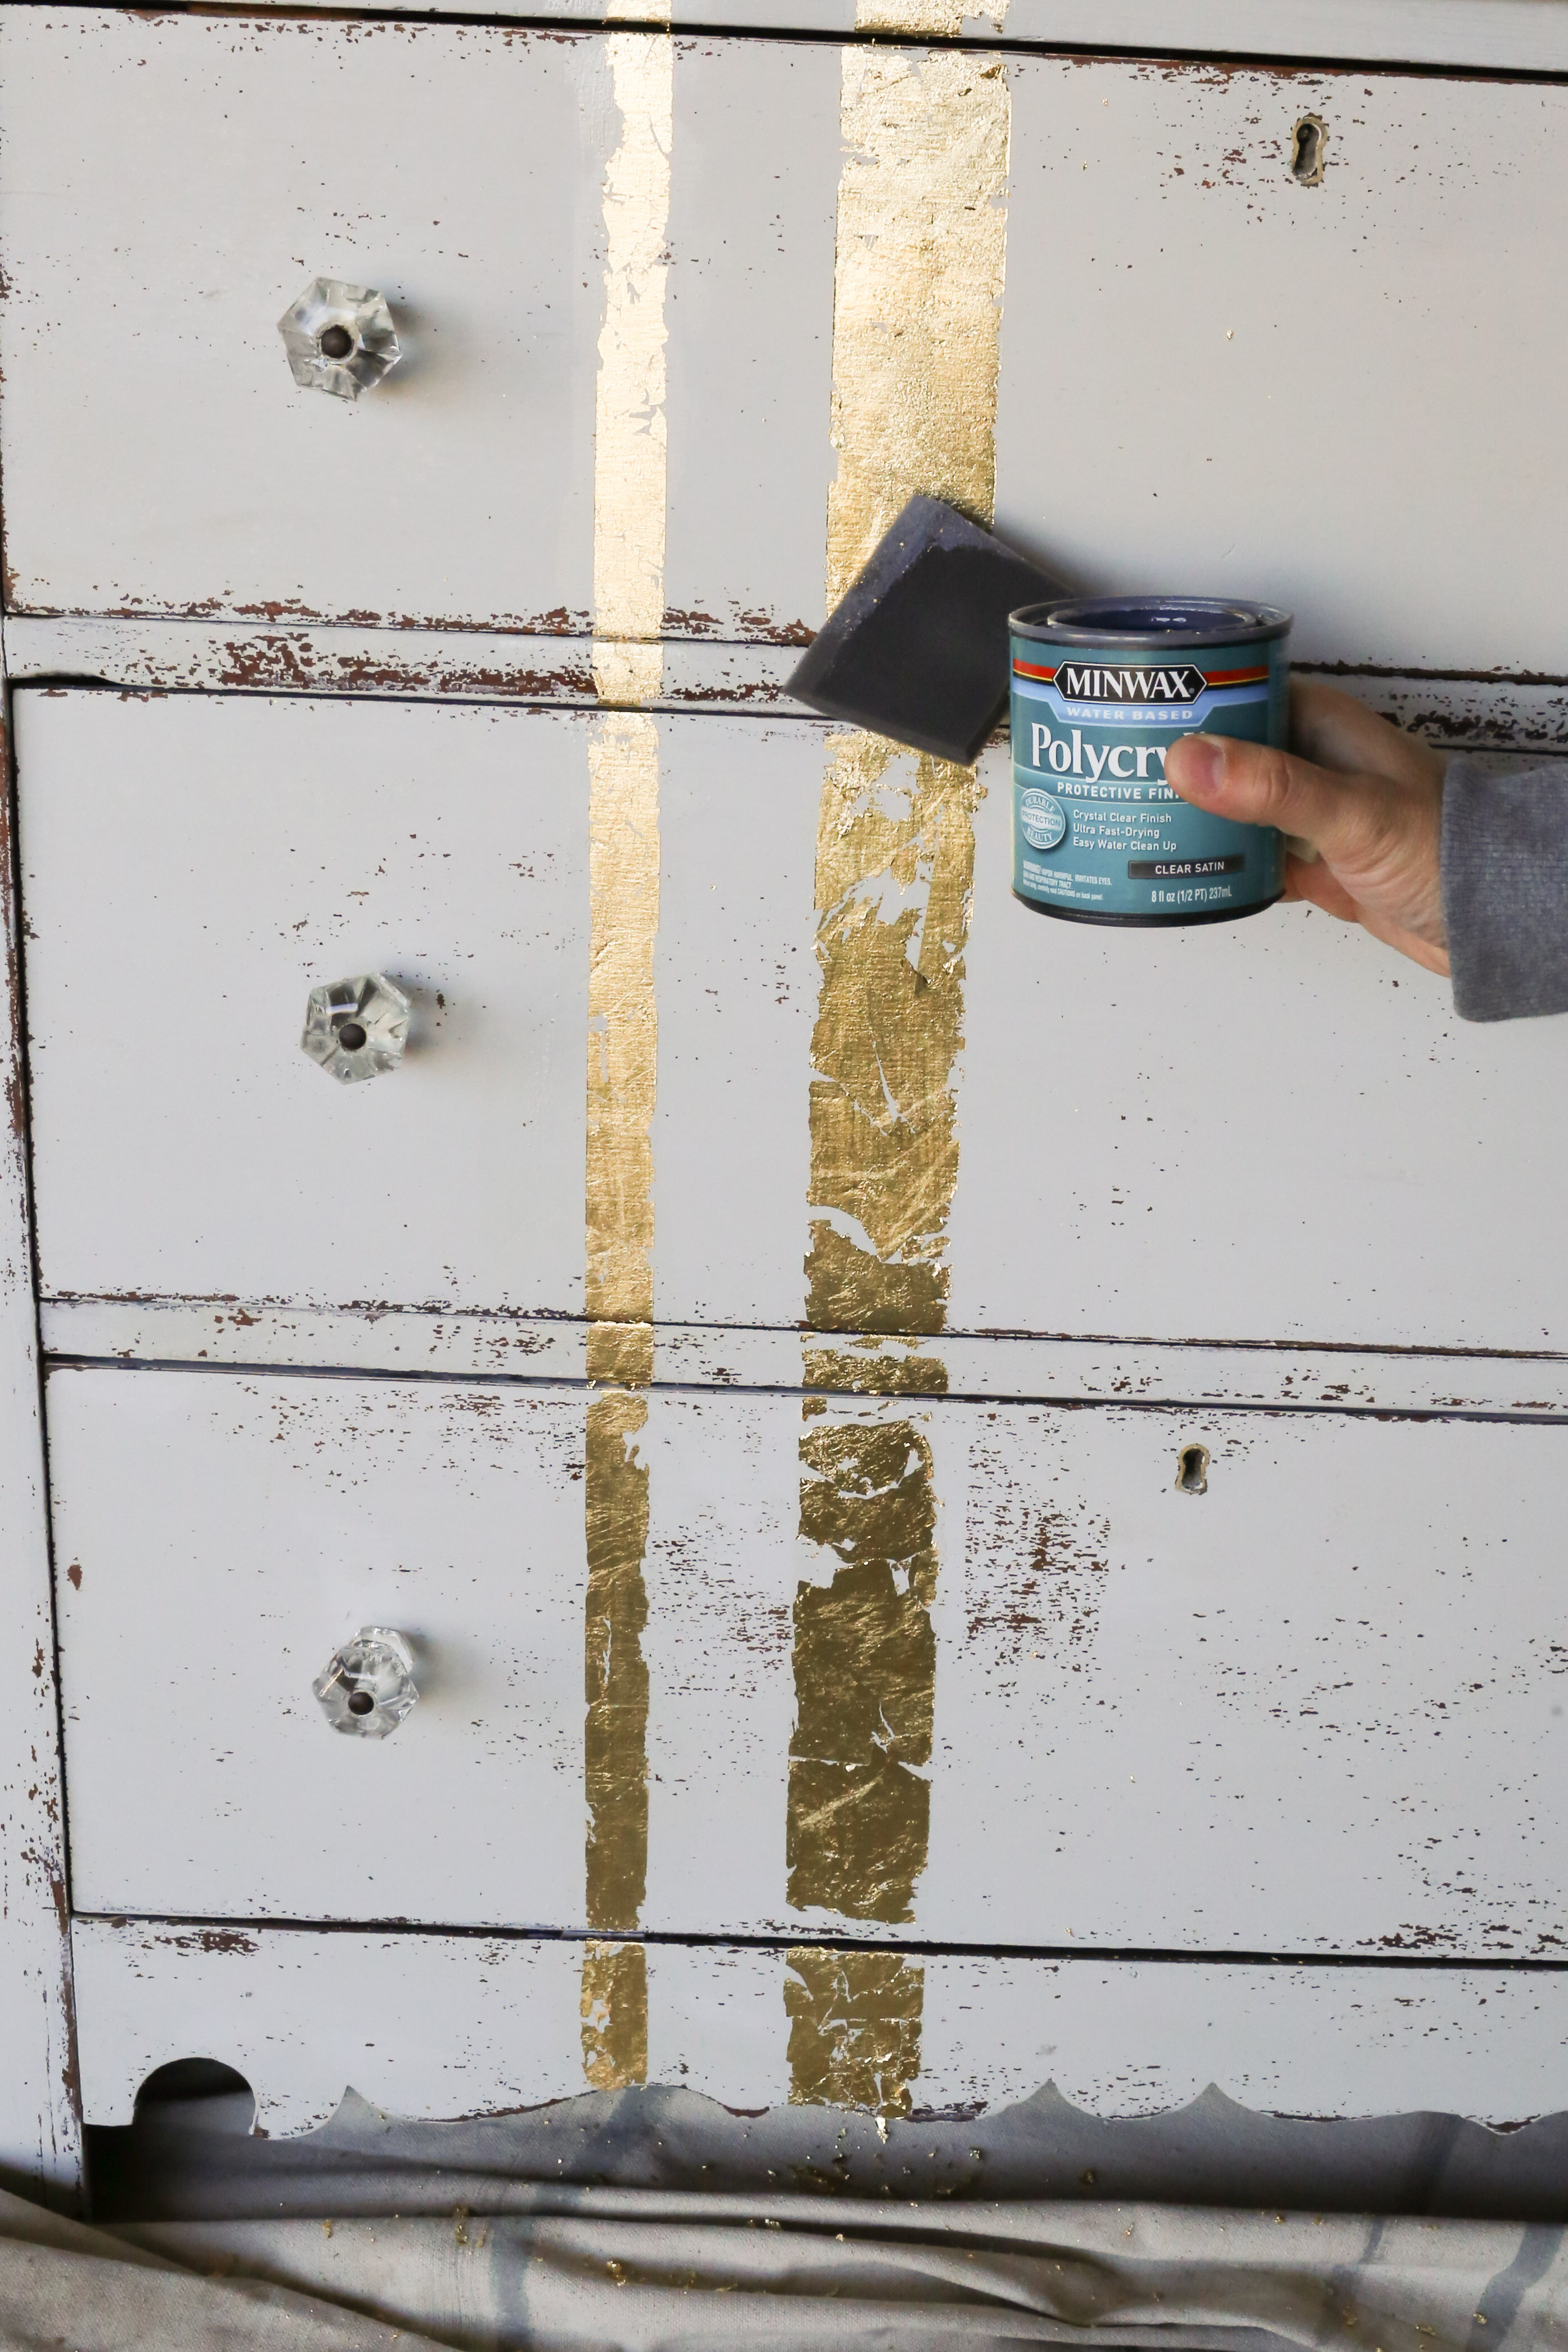
step four | Brush the surface. Take the large gilding brush and gently brush over the entire gilded surface. Use a gentle circular motion. This will remove any loose flakes of gold. If you find large areas of gold gilding did not stick you can go back and repeat steps two and three in those areas.
step five | Seal the gold gilding. Apply a thin layer of polyurethane with a foam brush. This will protect the gilding and keep it from peeling off. You can also find a spray version of the polyurethane in the crafting section of the store.
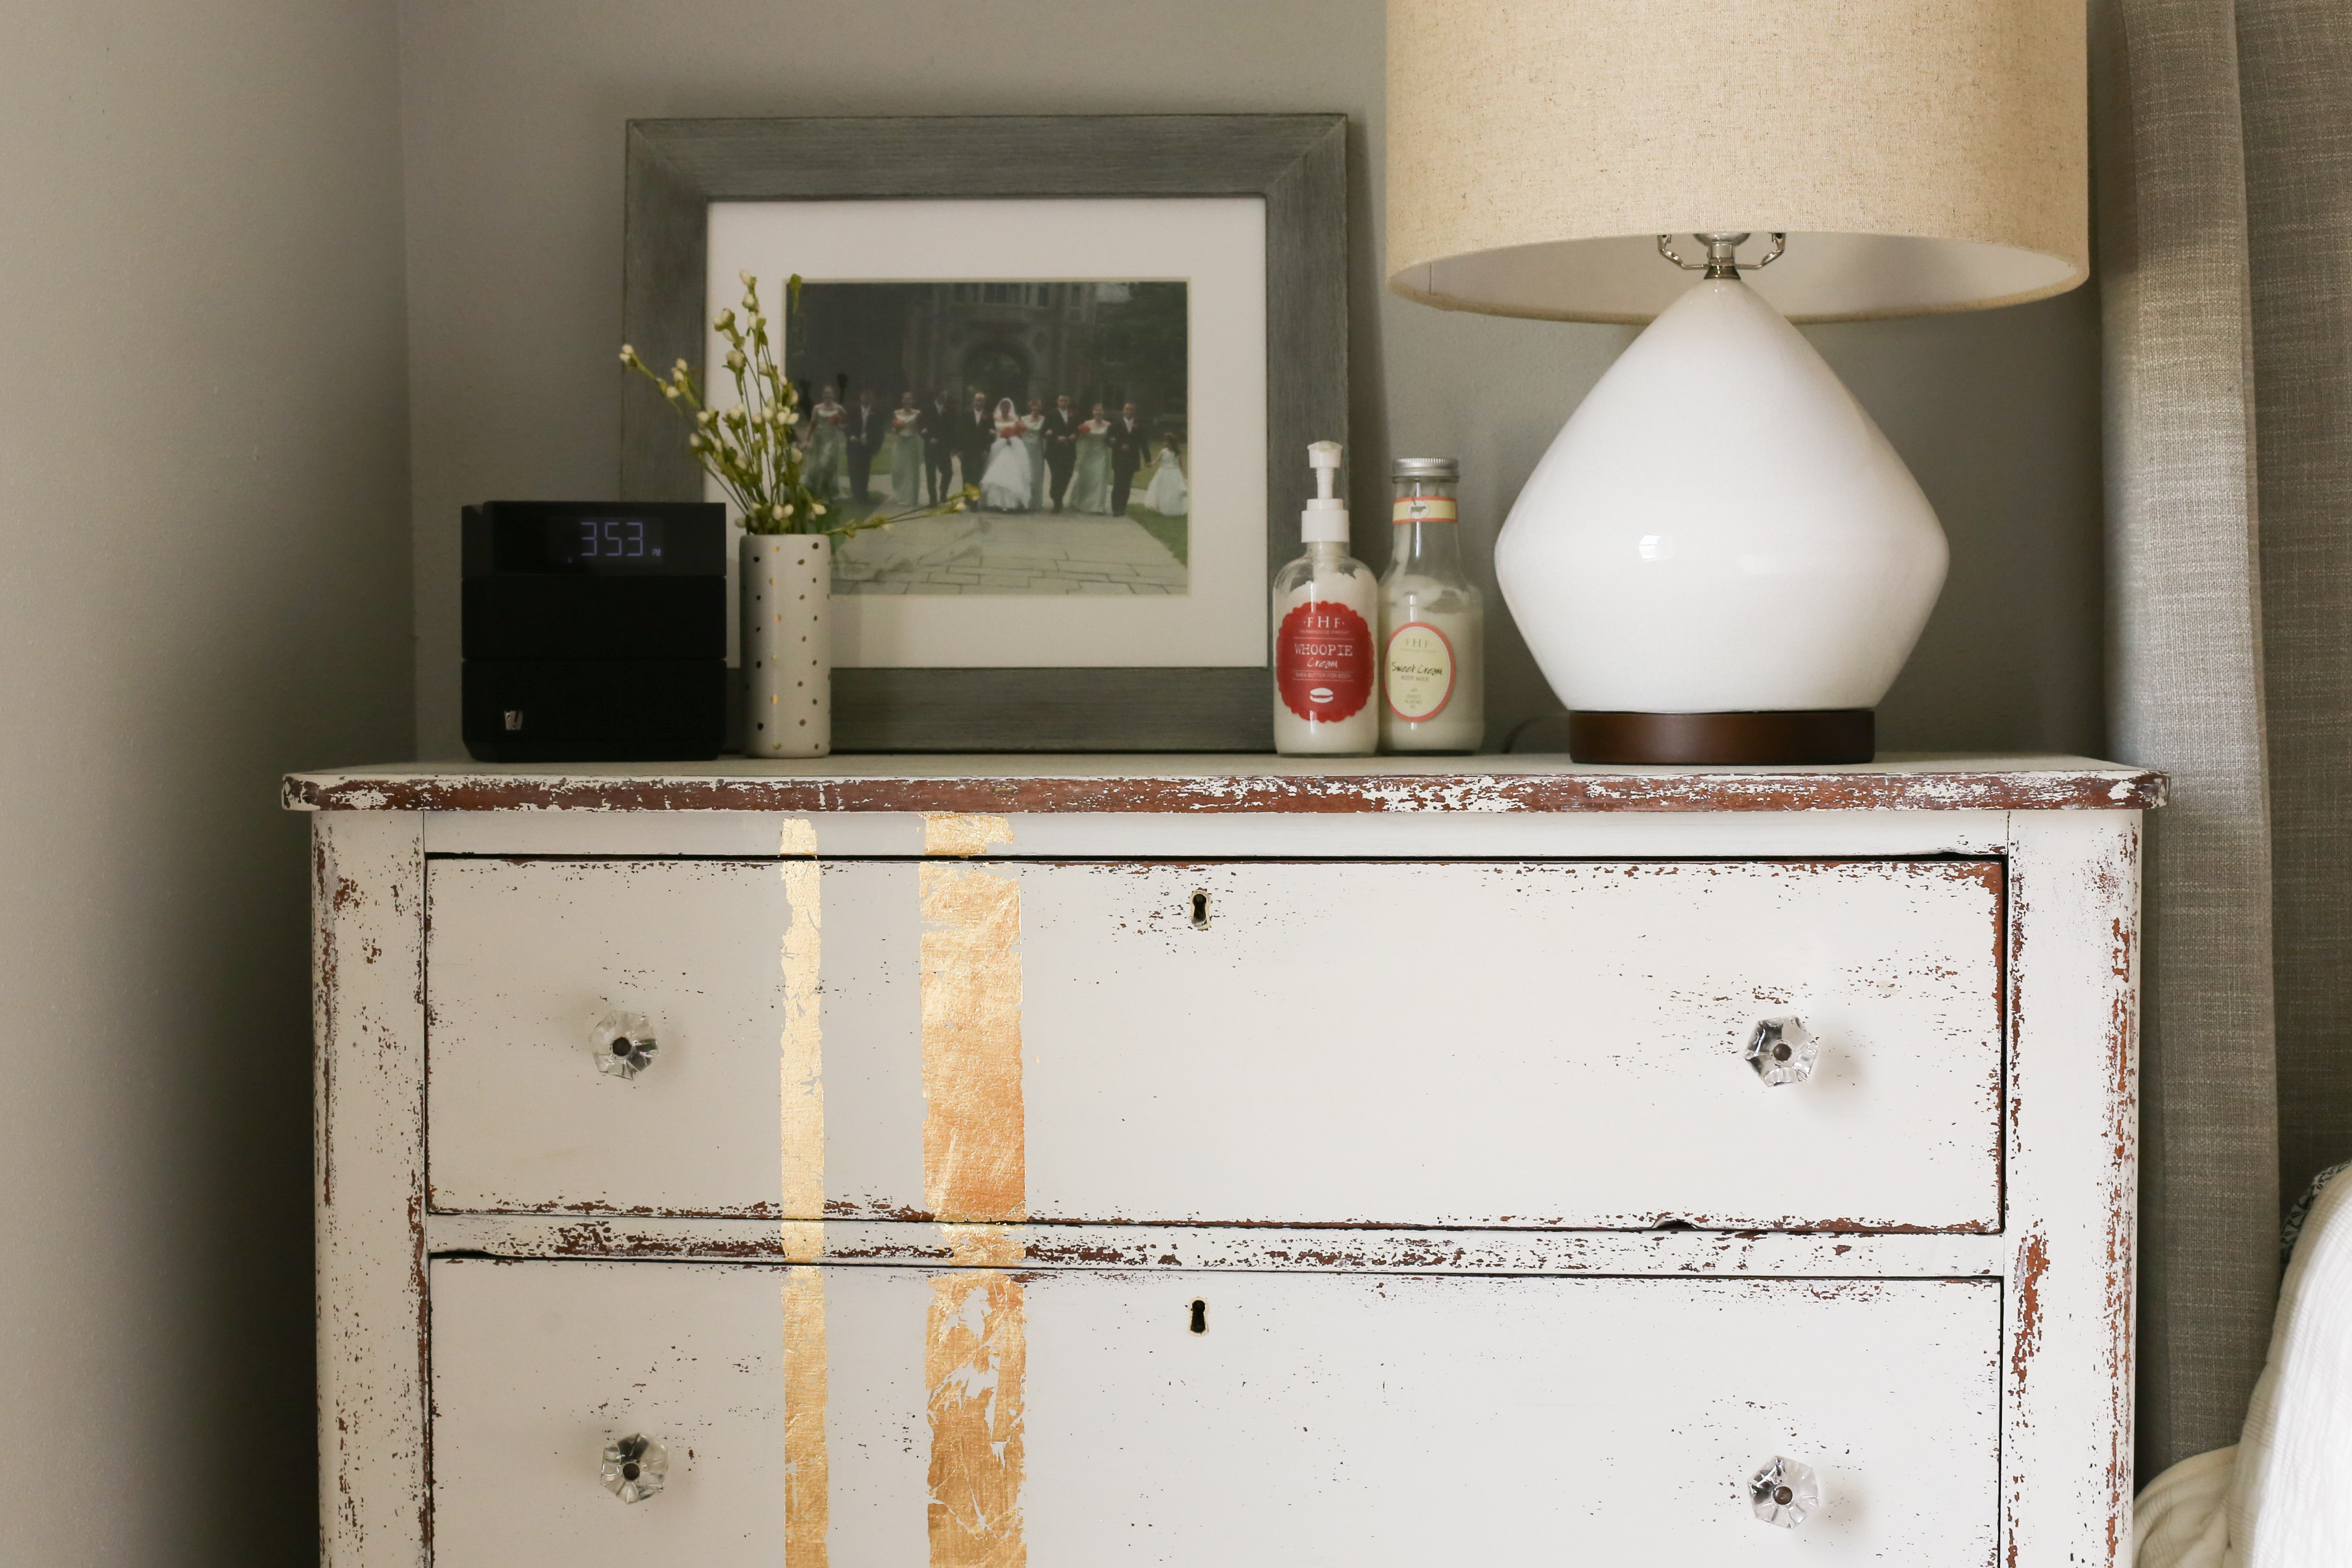
And with those five steps you are done! You have yourself a beautiful, shiny, and truly one of a kind piece of furniture for your home. Job well done! If you use these five steps for gold leafing I would love to see your final result! Remember, mine wasn't perfect. But it was perfect for my home. Enjoy your hard work and make sure to show me!
Can't wait to see what you create,

Thanks for sharing. I’ve tried using gold leaf before and it ends up every where except where I want it to go. lol. The night stand looks gorgeous BTW 🙂
Your night stand looks gorgeous with a glam. Thank you for sharing with us at #HomeMattersParty. We hope to see you again next week on Friday, @ 12.00AM EST
Thanks for stopping by!
I love this! Love how rustic it looks and has given me inspiration to update my daughter’s dresser that needs some love! Visiting from Colors + Crafts party.
Thanks! It is still holding up well in our bedroom!